Introduction
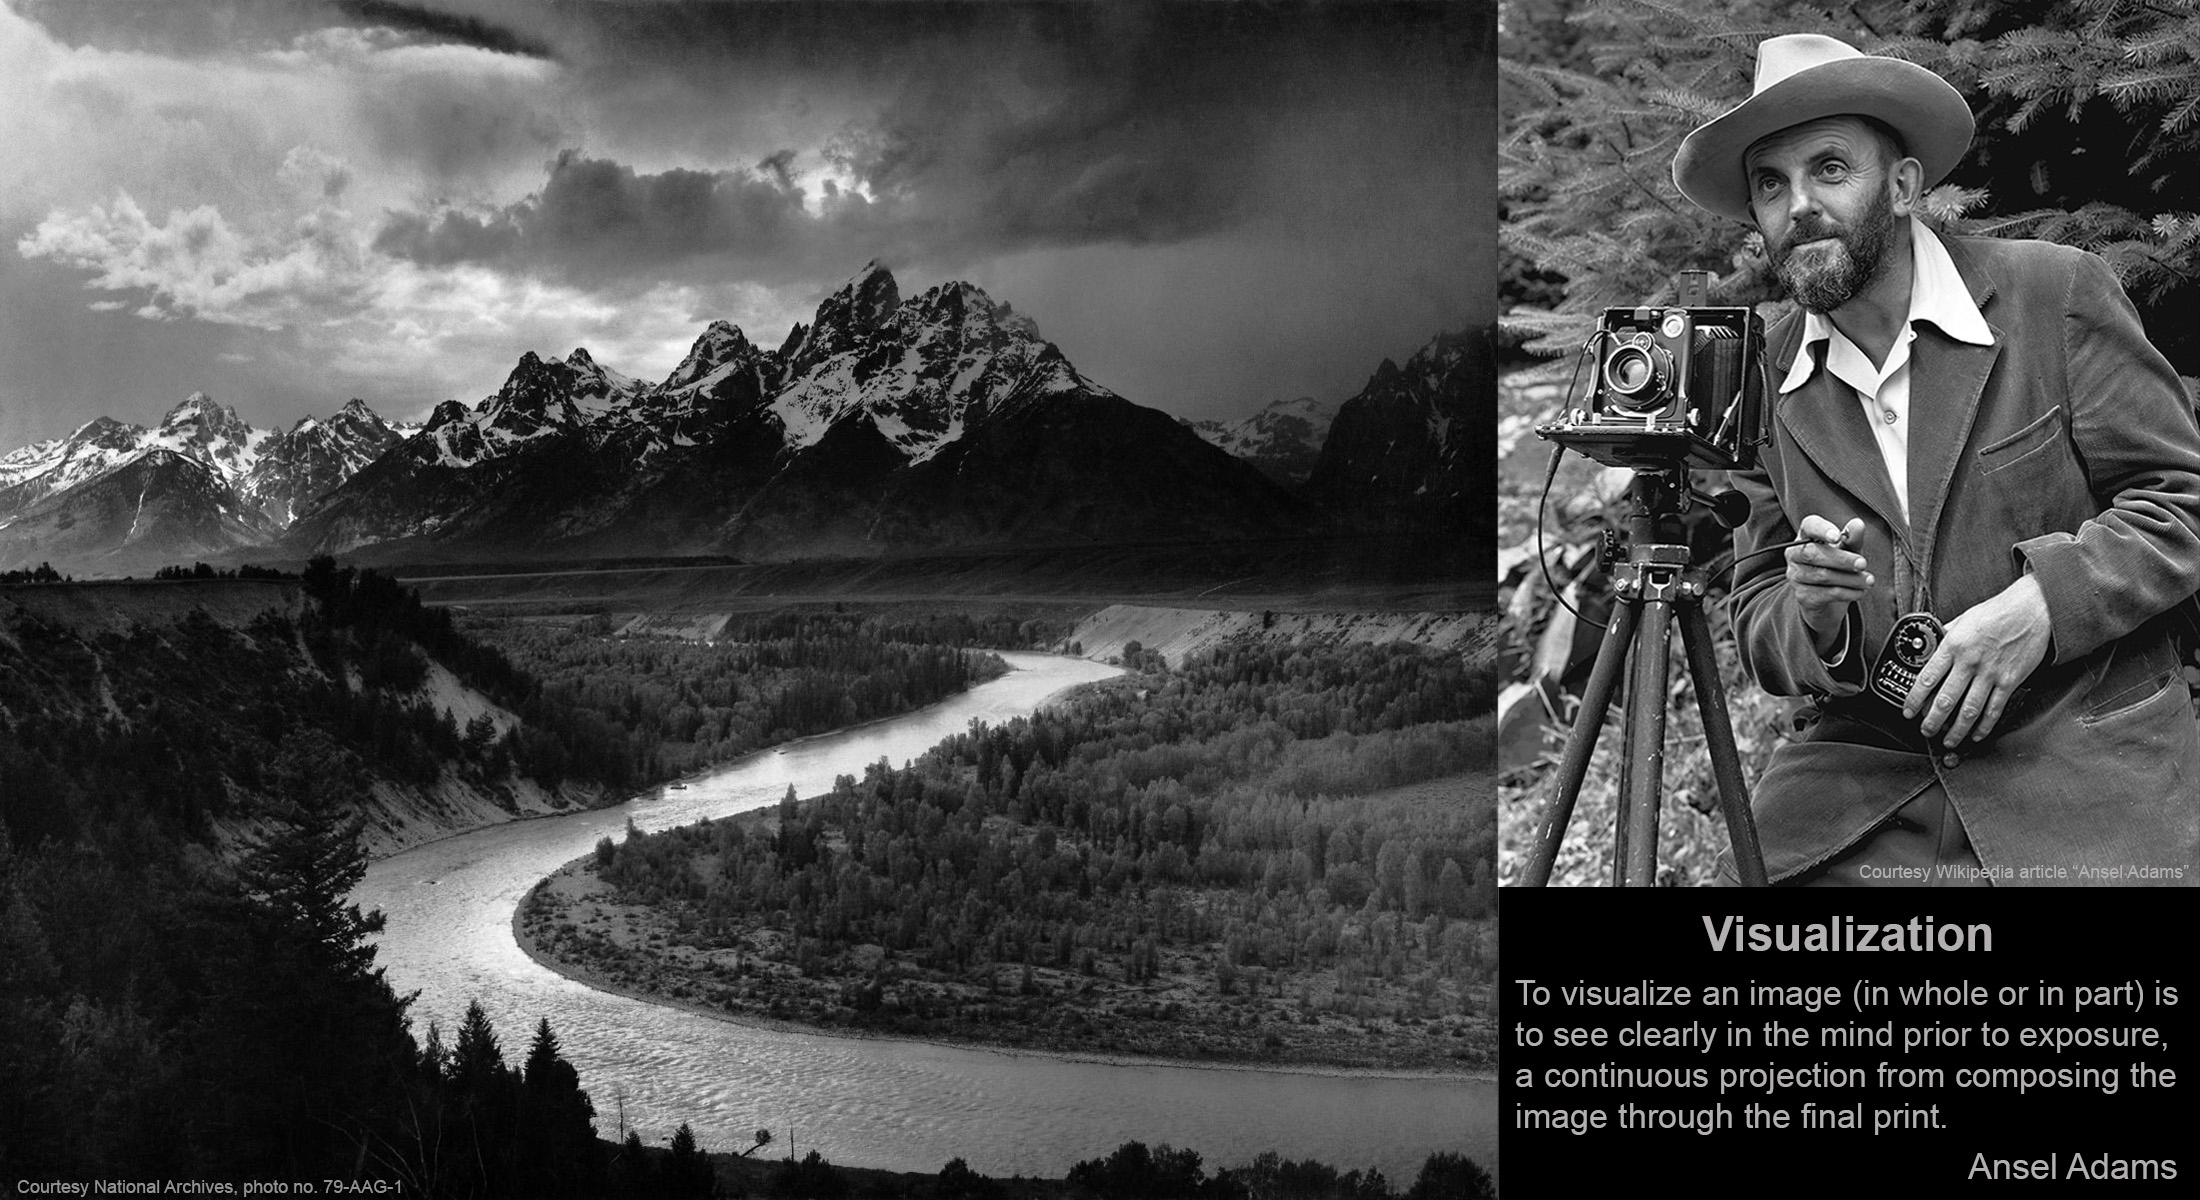
Ansel Adams employed several visualization tools and techniques to bring his pre-visualized images to life, particularly given the technological constraints of his time. It all starts with envisioning the possibilities and then using a composing card, the zone system, filters, format cameras, field notes, and darkroom techniques that would enable him to bring it to reality in print. The aim here is to summarize his key methods, and then discuss tools available today that photographers could use to achieve similar results. Throughout, YouTube videos and links are embedded to provide an enhanced understanding of the method, technique, or tool used.
Let’s make a review of his process.
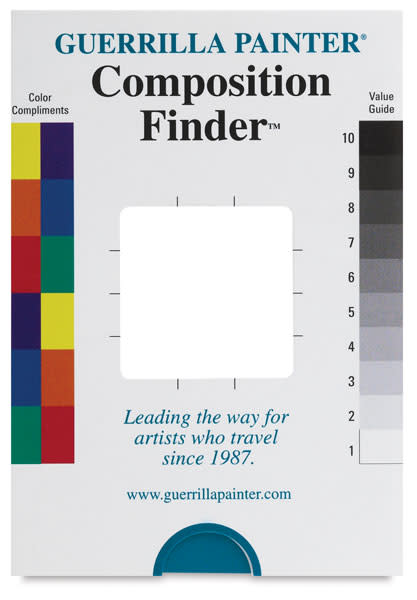
A Cut-out Card or Composing Card
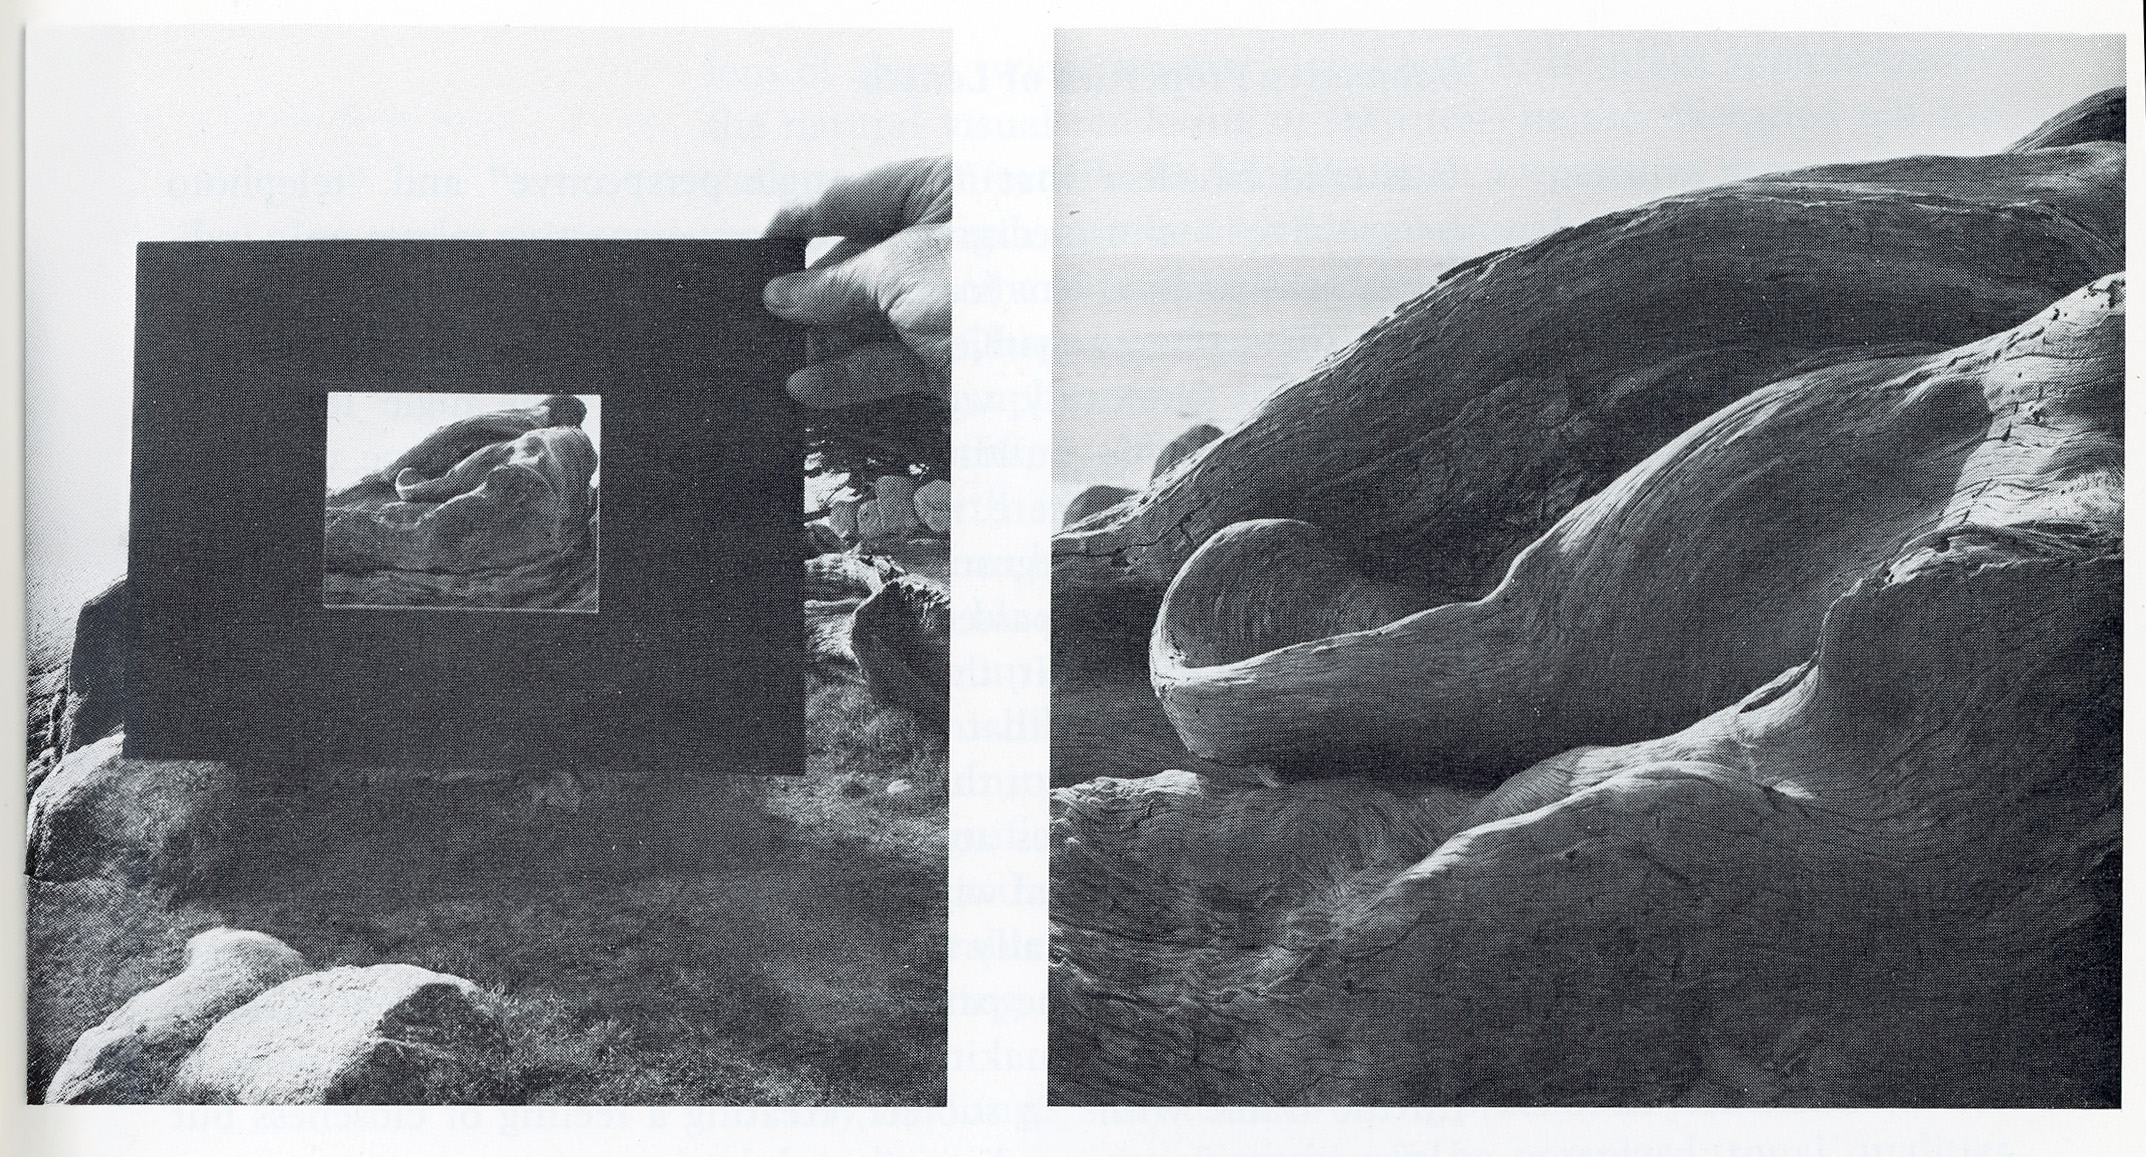
This allowed Adams to rapidly visualize a composition without having to set up the 8×10 view camera. Moving the card closer to the eye simulates a wide-angle lens composition. Whereas, moving it farther away simulates a telephoto composition.
The Zone System
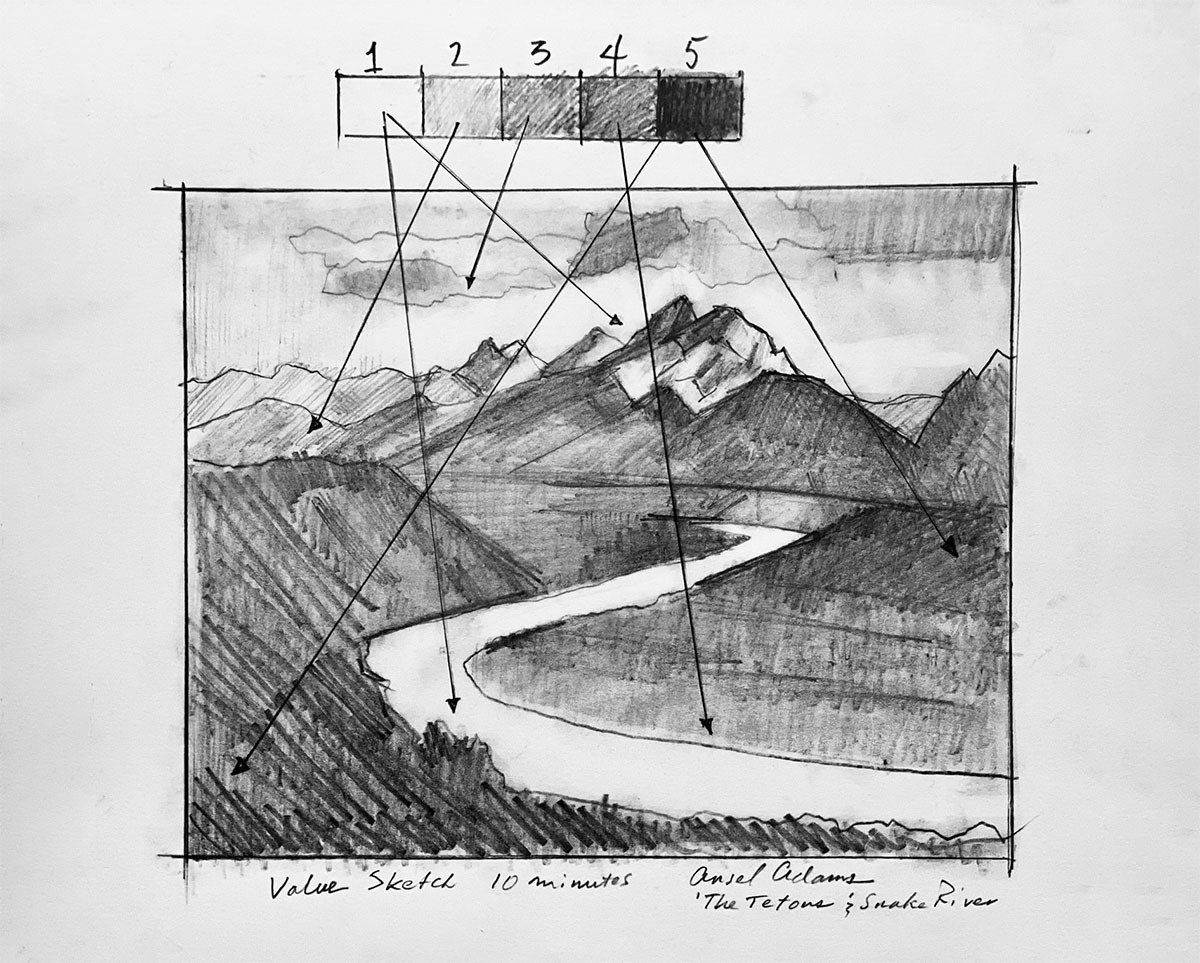
 Developed with Fred Archer, this technique divides a scene’s tonal range into eleven zones, from pure black (Zone 0) to pure white (Zone X). By previsualizing which parts of the scene would fall into which zones, Ansel Adams could adjust his exposure and development processes to achieve the desired contrast and detail. To better understand the Zone System, check out the following YouTube video.
Filters
Ansel Adams used various optical filters to control the contrast and tonal values in his black-and-white images. For instance, a red filter could darken a blue sky, making clouds pop in greater contrast. Filters played a crucial role in controlling contrast and tonal values. Filters selectively block or transmit certain wavelengths of light, which can either darken or lighten different areas of the image. By using filters, photographers were able to manipulate the placement of various elements in the desired zones, ensuring that important details were captured within the appropriate tonal range and achieving the intended artistic effect.
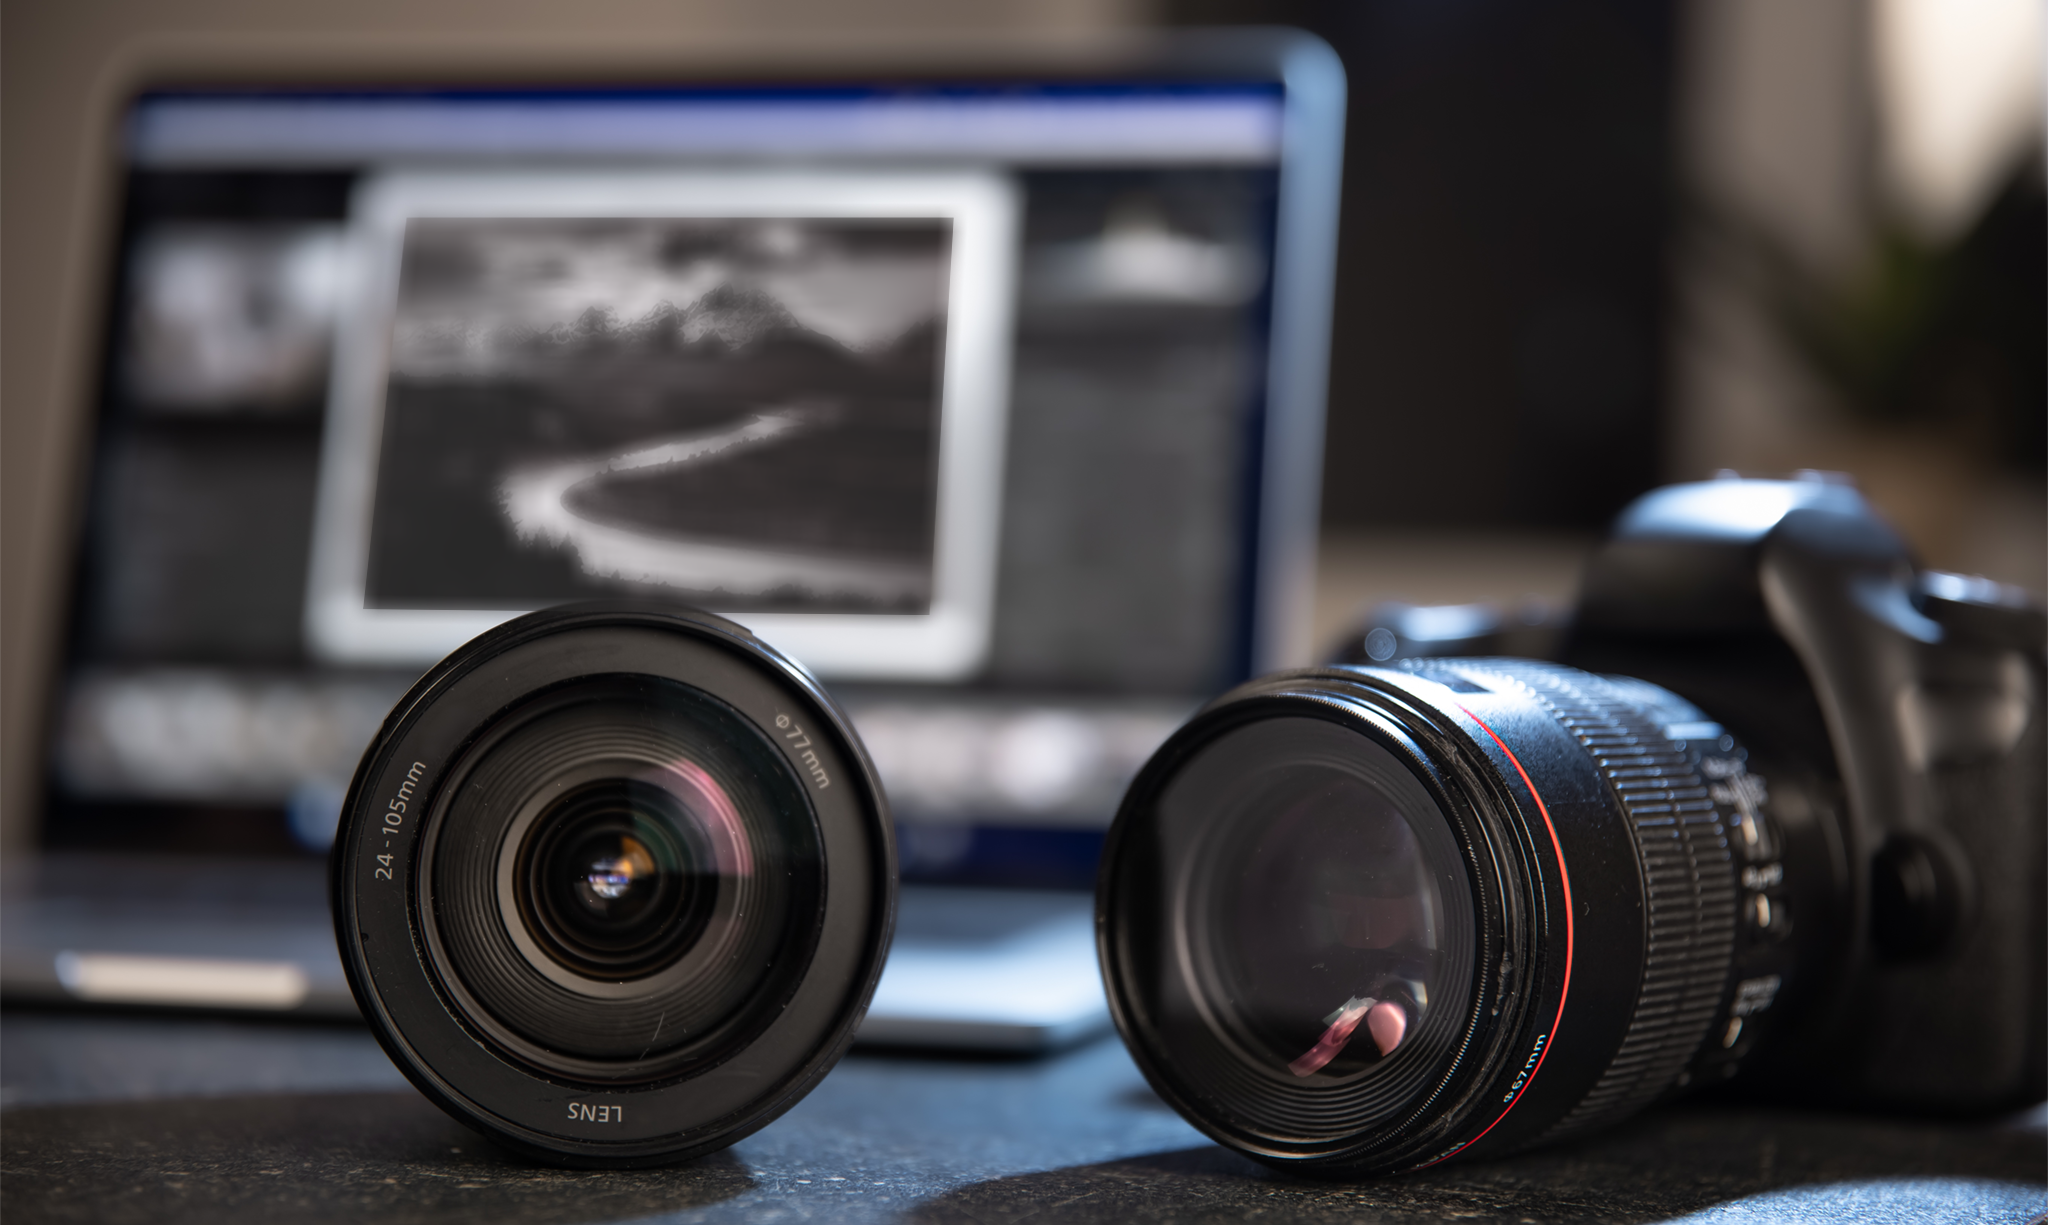
Large Format Cameras
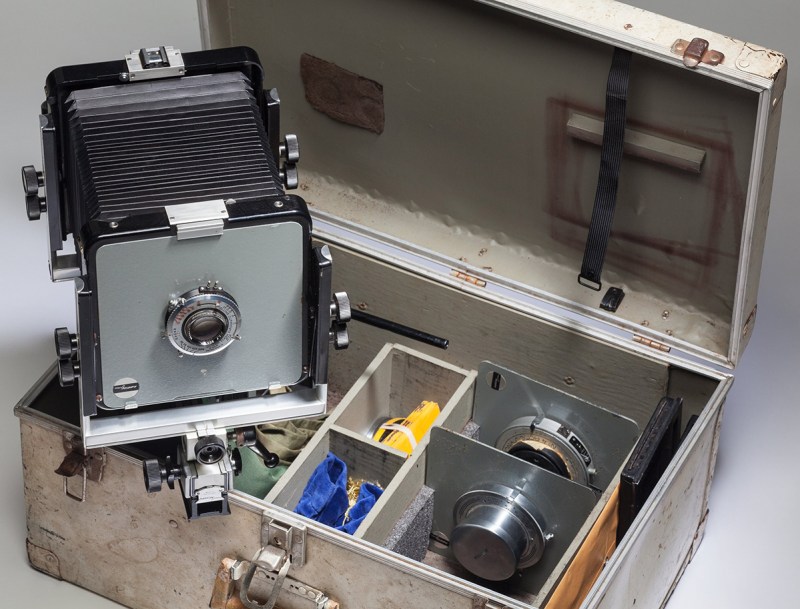
These cameras allowed Ansel Adams to capture maximum detail and quality. The large negatives also gave him more latitude in the darkroom for manipulating the image, because accurate exposure and contrast management could mean the difference between a stunningly detailed image and a lackluster one. By using the Zone System, photographers could ensure that each element in the scene was rendered with the desired tonal values, maximizing the potential of the large format negative’s rich detail and wide dynamic range.
Darkroom Techniques

Ansel Adams meticulously planned his darkroom processes to align with his previsualized images. He spent considerable time in the darkroom, perfecting his prints. He employed techniques such as dodging and burning, which involved selectively lightening or darkening areas of the print to enhance contrast and detail. Adams also utilized precise exposure and development times to control the tonal range of his photographs. By adjusting these variables, he could bring out the specific textures, highlights, and shadows he envisioned. His expertise in the Zone System allowed him to anticipate how these adjustments would affect the final print, resulting in images that perfectly matched his artistic intent and pre-visualization.
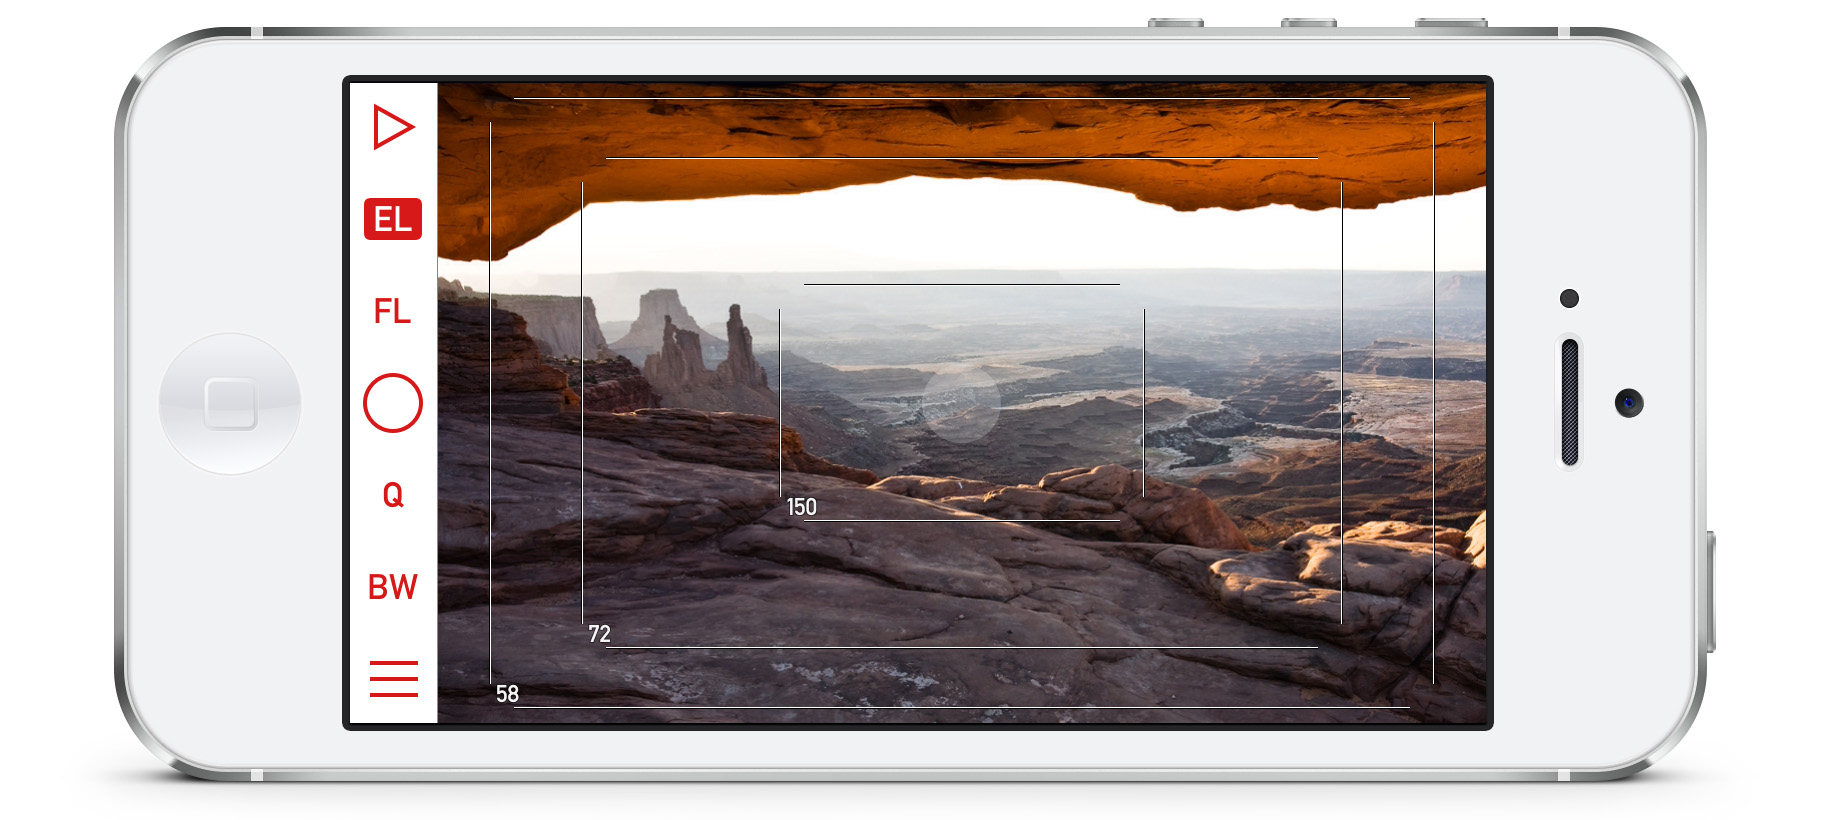
Scouting for shots and leaving the camera in the car. In this YouTube video, videographer Steve O’Nions demonstrates using the smartphone Mark II Artist’s Viewfinder, which builds a virtual camera model with a focal length of your choosing. The viewfinder stores location and simulation metadata with the pictures of your scouting so that you can review them later, even on a computer. This is an exceptional smartphone application that exceeds Ansel Adams’ pre-visualization composing process.
The Zone System
 Originally developed by Ansel Adams and Fred Archer for black-and-white film photography, it has found new value in the digital camera environment. This technique, which divides the tonal range into 11 zones from pure black to pure white, lets photographers meticulously control exposure and capture the full spectrum of detail in their images. In the digital realm, the Zone System assists photographers in managing dynamic range, ensuring that highlights are not blown out and shadows retain detail. By applying this system, digital photographers can achieve greater precision and consistency in their exposures, resulting in images that are both visually compelling and technically sound. Embracing the Zone System in digital photography elevates the artistic and technical quality of photographs, bridging the gap between traditional and modern photographic practices.
With today’s digital cameras and most photos being in color many may think that the zone system has a lesser value, but as Alan Ross explains in the following video it is worthwhile knowing the tonal range of your digital camera. The key is understanding when your camera sensor fades to black or white and whether it is more than 2 or 3 processing subject luminances or in simple terms how much change is occurring with each stop. Like those who used the Zone System during the period of Black and White photography, today’s photographer must also recognize how the hues match each zone.
Digital Cameras
Applying the Zone System to digital color photography adds an extra layer of complexity but can greatly enhance your control over the final image. Here’s how you can do it by referencing tools you can use to help improve the quality:
Understanding the Zones in Color:
In black-and-white photography, the zones represent shades of gray from black to white. In color photography, each color channel (red, green, blue) has its tonal range that corresponds to the zones based on the luminance of the subject. See the above Zone System chart to visualize the tonal changes and hues as they change in each zone for primary and secondary colors.
Steps to Apply the Zone System:
Visualize Zones in Color: Try to see the scene in terms of zones but in color. Think about where you want your mid-tones, highlights, and shadows.
Metering: Use spot metering to measure light in different parts of your scene, considering how the color tones fall within the zones.
Expose for Mid-Tones: Decide which area of your scene you want to be in Zone V (middle gray) and expose accordingly. For instance, if you want the sky to be the mid-tone, set your exposure so that the sky falls in Zone V.
Dynamic Range: Use your camera’s histogram to ensure you’re capturing detail in both the highlights and shadows. Digital cameras can display histograms for each color channel, which helps in balancing the exposure across colors.
- Exposure Compensation: Adjust your exposure settings to place key elements of your scene in the desired zones. For example, if you want to capture details in the shadows, you might need to overexpose slightly to bring those details into a lighter zone.
- Shoot in RAW: Shooting in RWA format gives you more flexibility in post-processing to adjust the tonal range and recover details in shawos and highlights.
Post-Processing: This is where the Zone System shines in digital color photography. Use editing software to adjust each color channel’s exposure and contrast. Tools like curves and levels are particularly useful here.
Practical Tips:
RAW Files: Always shoot in RAW format to have maximum flexibility in post-processing.
Bracketing: Use exposure bracketing to ensure you capture the full dynamic range of the scene.
Histograms: Pay attention to both the overall histogram and individual color channel histograms to avoid clipping and retain color detail.
By understanding and using the Zone System, you can better control the exposure and color balance in your digital color photographs, leading to more intentional and impactful images.
Here are some YouTube videos that can help you apply your visualization efforts using a zone system approach. Of particular value is the Color Checker Passport video.
Filters
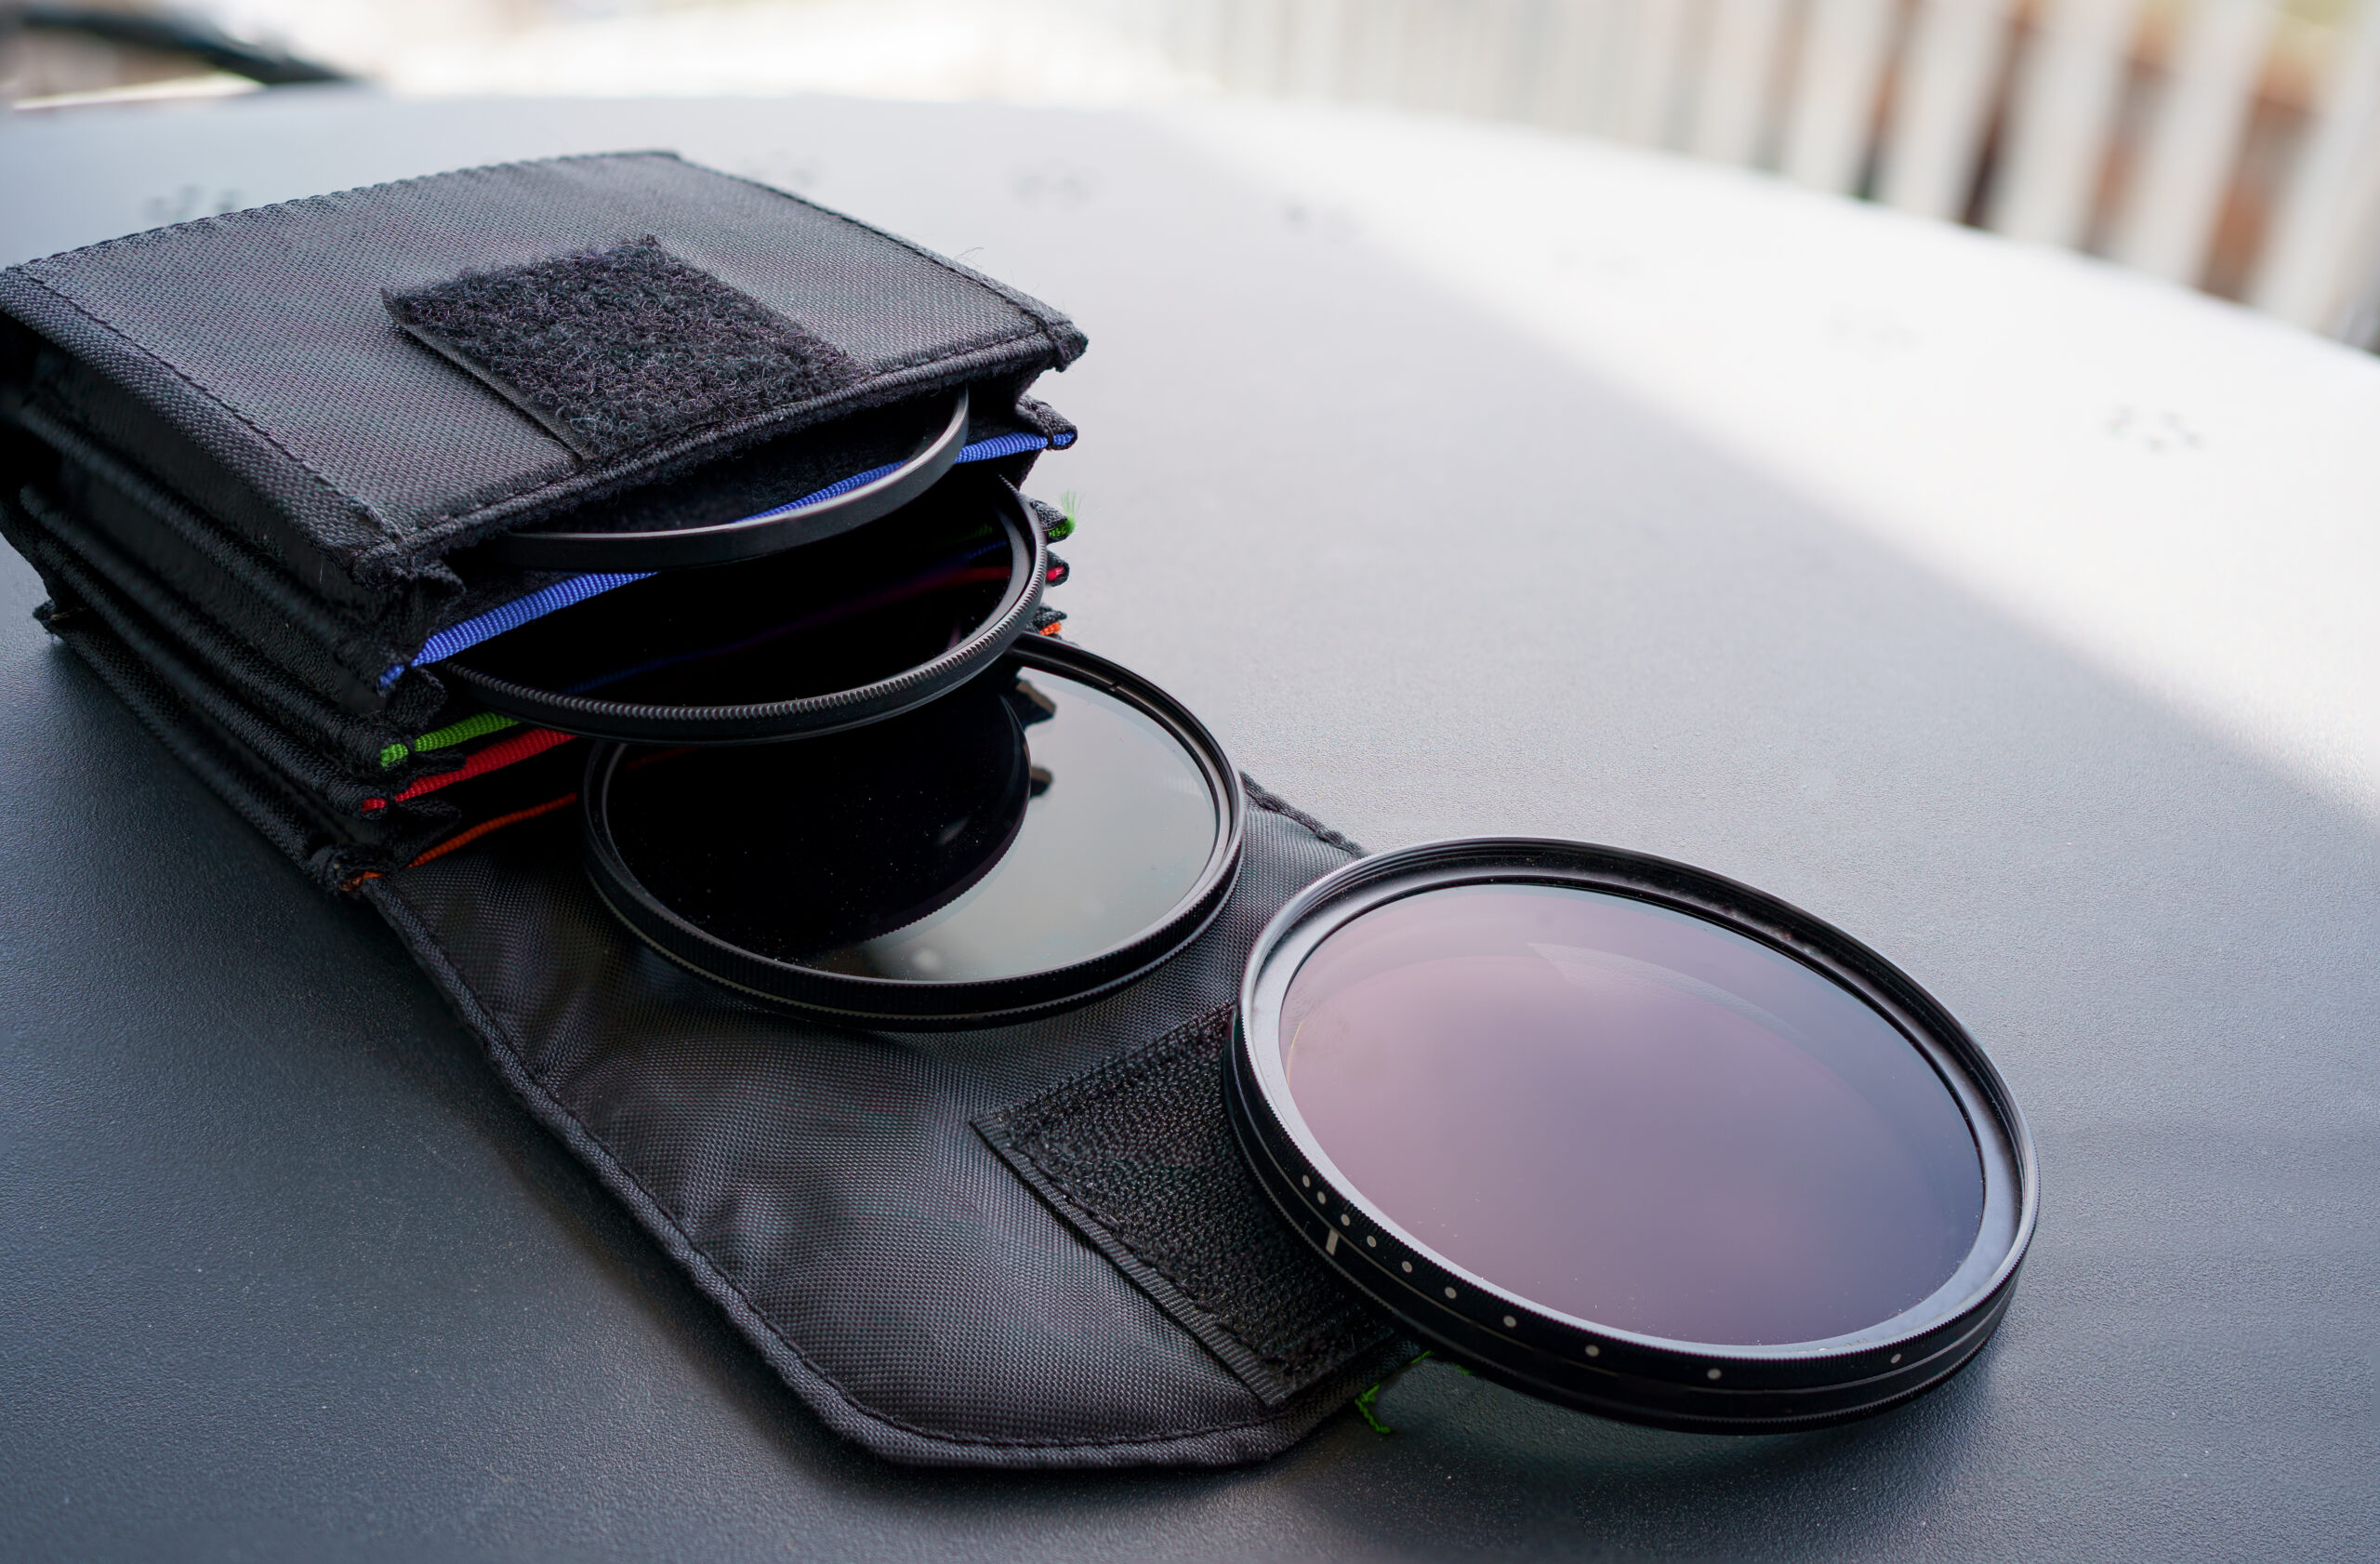
Ansel Adams used various optical filters to control the contrast and tonal values of his black-and-white images. For instance, a red filter could darken a blue sky, making clouds pop in greater contrast. Filters played an important role in helping to achieve zone focus.
Today’s cameras offer histograms and high dynamic range capture, which aid the photographer in shifting the zone focus. However, even with today’s technology in digital photography, filters still play a role. Whereas Ansel Adams used the Zone System to control the light, now we use neutral density filters, ultraviolet filters, and polarizing filters. These become the mainstay for most landscape photography. For the black and white photographer, whose interest is applying the same effect filters have on the film NIK Silver Efex by DxO. Though this is a post-processing or darkroom tool, it is mentioned here because of the filtering concept it employs.
Darkroom Techniques – Post-Processing
Adams was a master in the darkroom both in knowledge of resources used and the techniques, that he popularized, which is using dodging and burning techniques to lighten or darken specific print areas. It is in the post-processing that visualization becomes the reality by fine-tuning the tonal balance and highlight important elements of the composition.
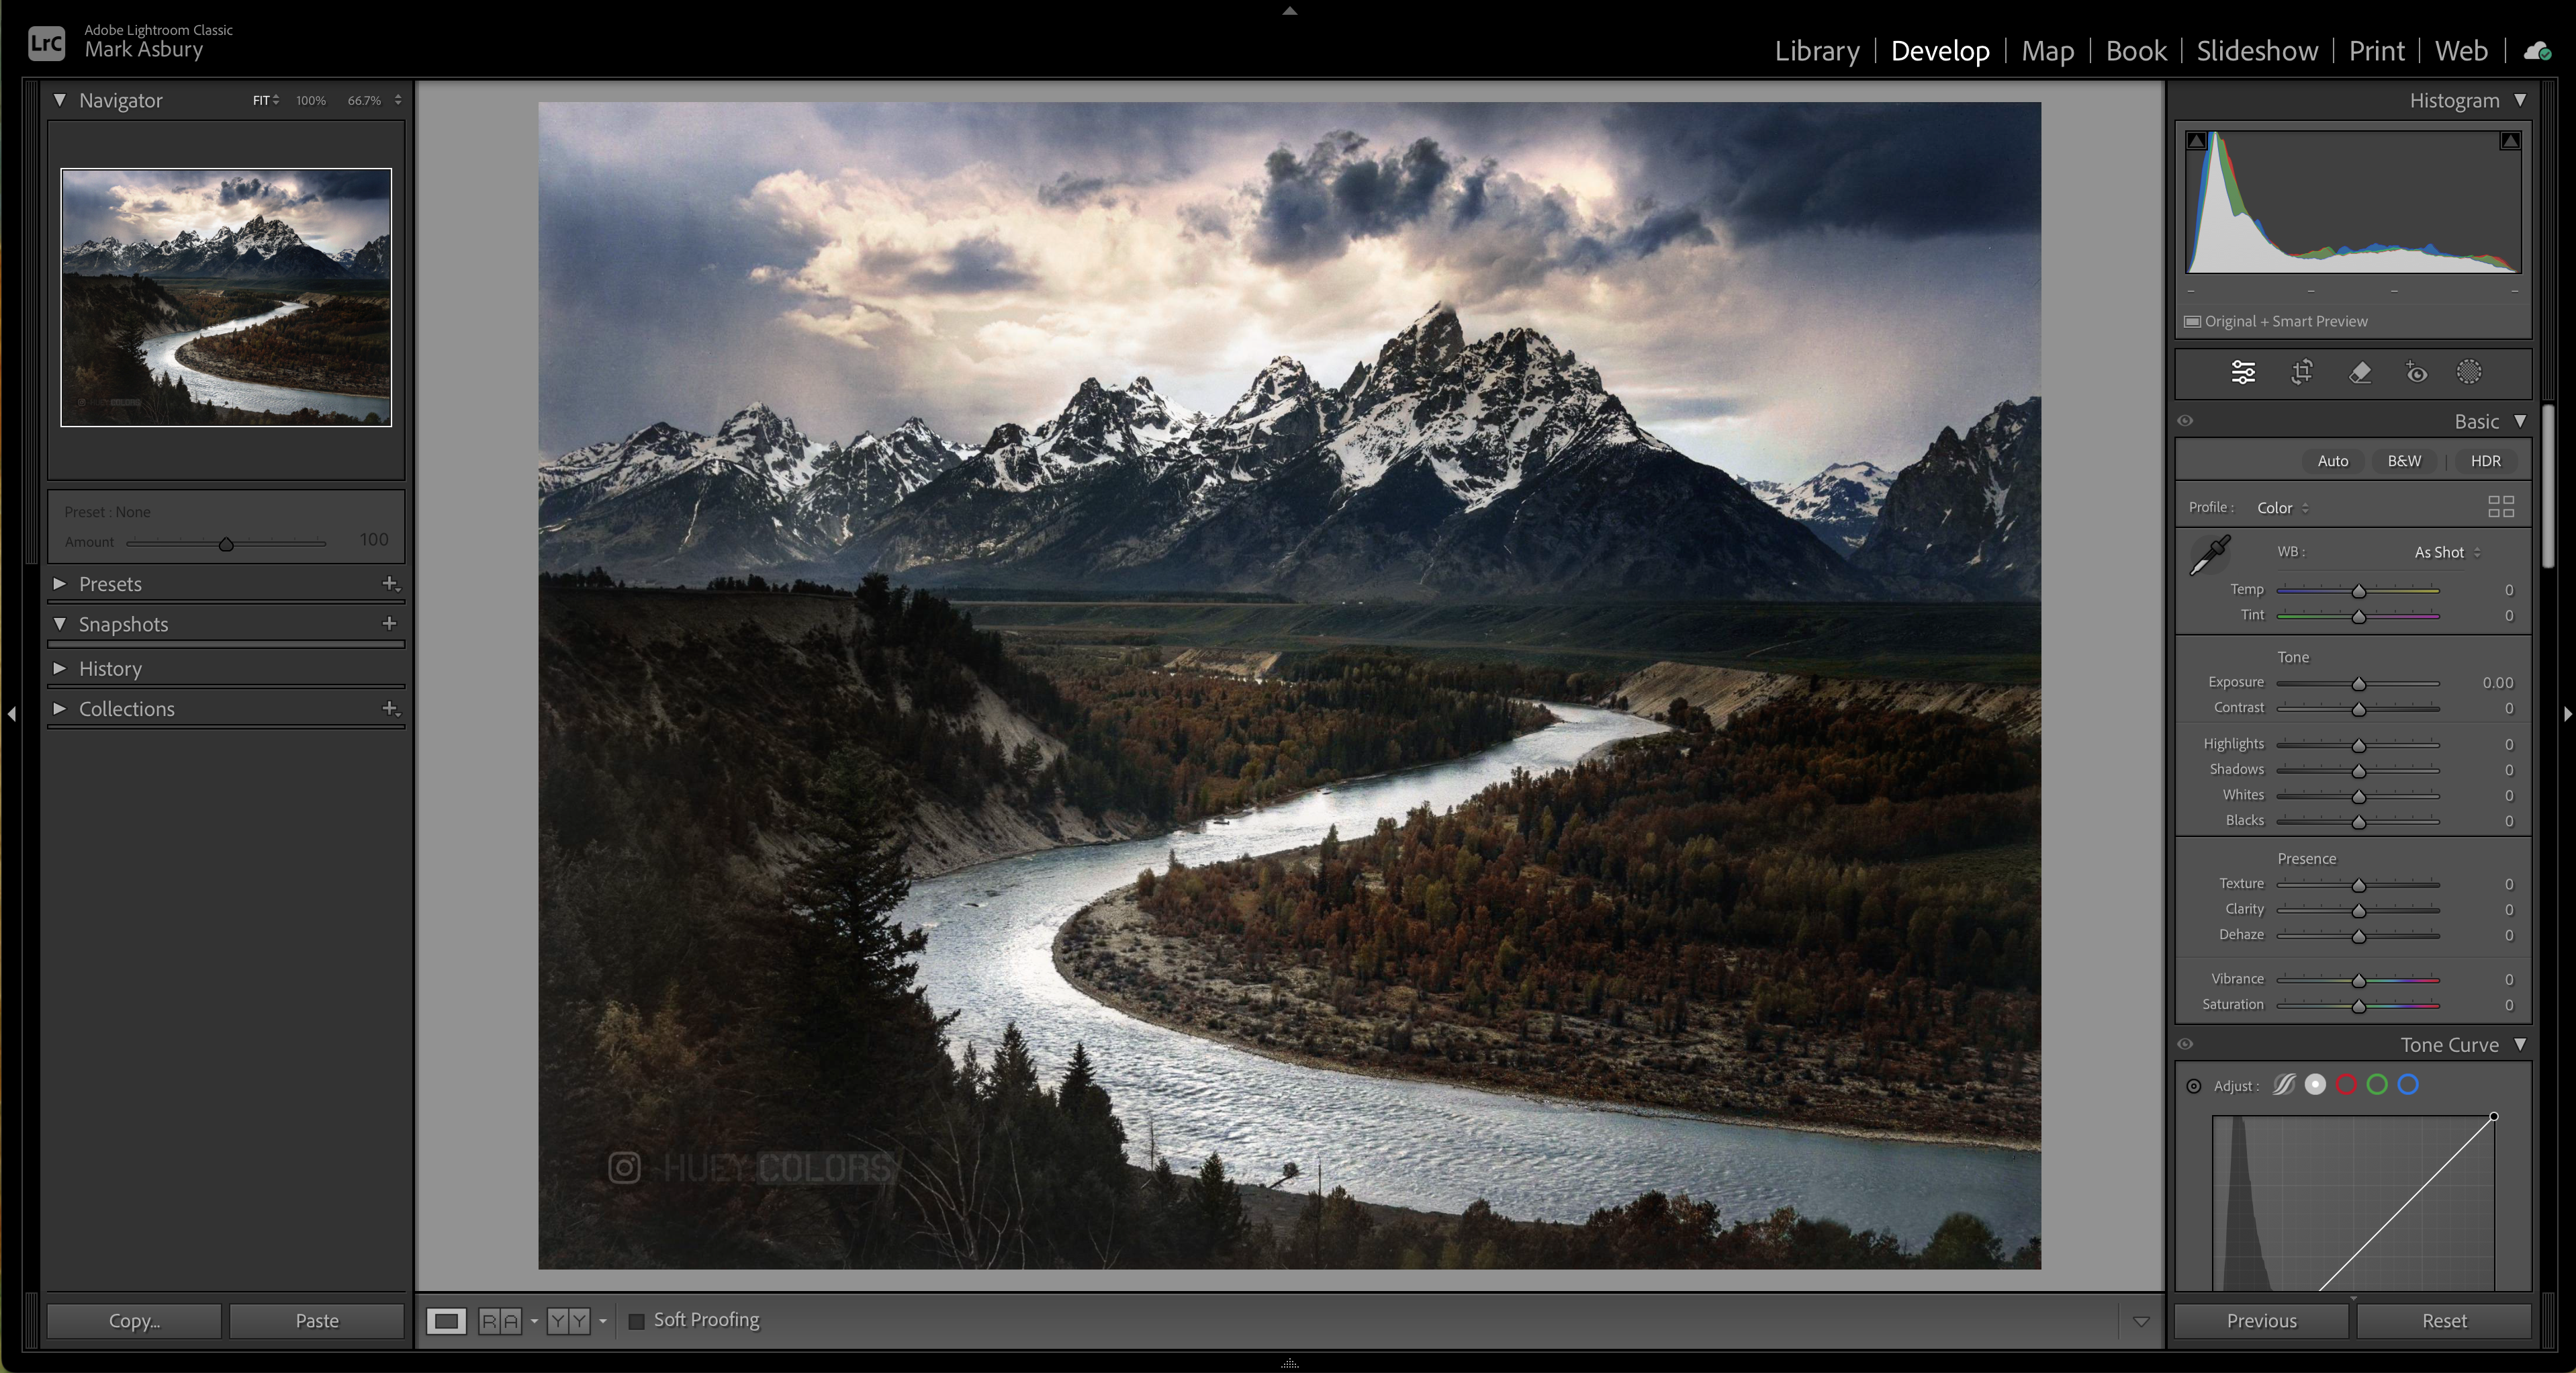
Emulating Ansel Adams’ darkroom techniques in Adobe Lightroom or Camera Raw can help you achieve that iconic black-and-white look. Any user of these products, who have a working knowledge the Zone System will readily realize that the Basic panel Adobe designed these sliders to match the Zone System eleven zones. Here are some steps to guide you:
- Shoot in RAW: Start by shooting in RAW format to ensure you have the maximum amount of detail and flexibility in post-processing.
- Convert to Black & White: In Lightroom, go to the “Basic” panel and switch to the “Black & White” treatment. This will allow you to edit your image in black and white.
- Adjust the Tone Curve: Use the tone curve to control the contrast and tonal range of your image. Ansel Adams was known for his high-contrast images, so you might want to create an “S” curve to enhance the contrast.
- Dodging and Burning: Use the “Dodge” and “Burn” tools to selectively lighten or darken areas of your image. This technique helps to emphasize certain elements and add depth to your photos.
- Use Presets: There are several Lightroom presets available that mimic Ansel Adams’ style. You can find these presets online and apply them to your images for a quick transformation.
- Fine-Tune with Local Adjustments: Use the adjustment brush, radial filter, and graduated filter to make local adjustments to specific areas of your image. This allows you to control the exposure and contrast in different parts of the photo.
- Sharpening: Apply sharpening to enhance the details in your image. Use the “Detail” panel to adjust the amount, radius, and detail of the sharpening.
- Noise Reduction: If your image has noise, use the noise reduction sliders in the “Detail” panel to reduce it without losing too much detail.
Those that are looking to apply Ansel Adams visualization concepts show check out the below YouTube videos.
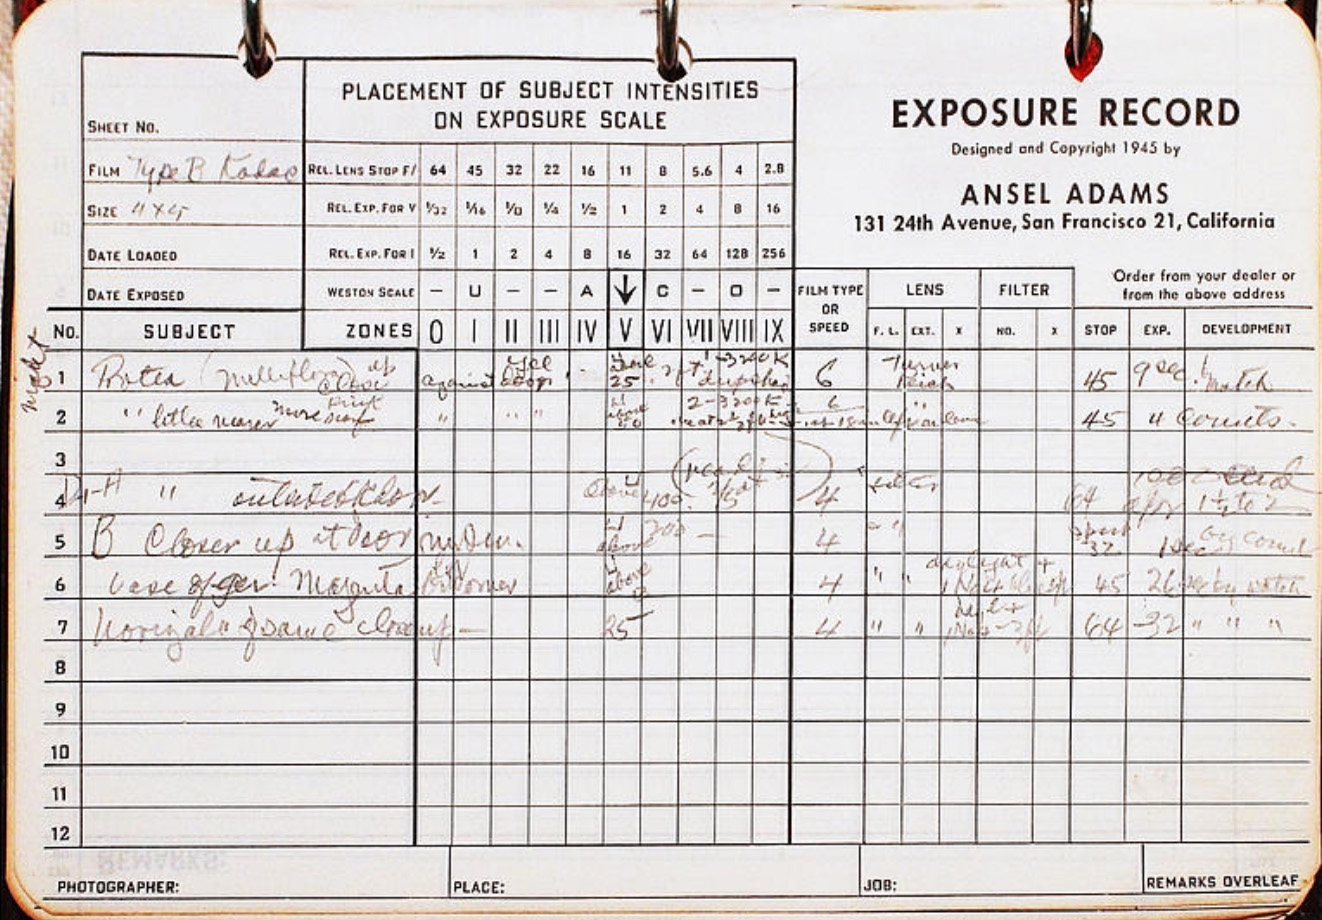
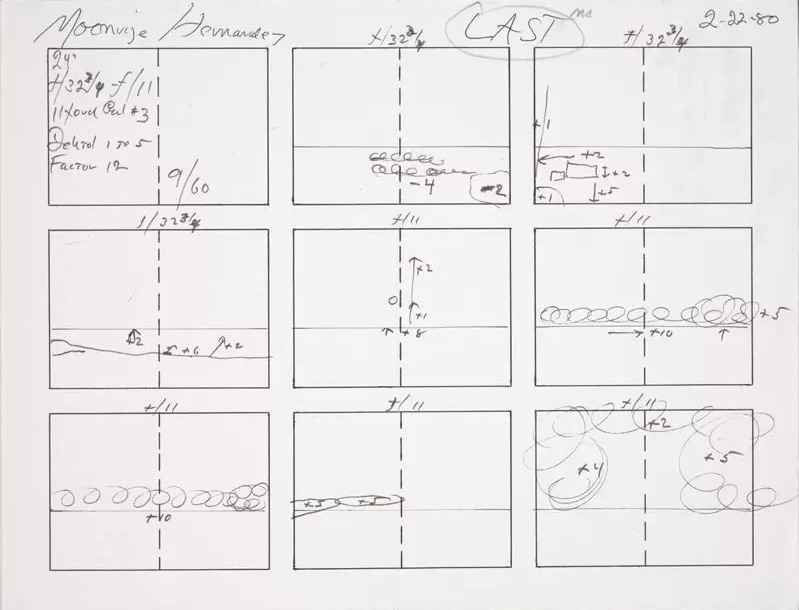
Field Notebooks

Adams meticulously documented his exposure settings, filter choices, and visualization thoughts in notebooks, which he could refer to when developing his prints. This helped him achieve consistency and precision across his work. Notes were taken in the field to record lens and shutter calibrations, film data, filters used and record exposure data, and most importantly instructions on developing each film image. This later part was essential in transcribing the target zones of emphasis. Then back in the darkroom detailed notes on enlargement exposure settings and bath times per type of paper, dodging and burning locations, and tools used. Much of the development notes were needed because there wasn’t any other way to replicate the outcome, especially with the dodging and burning.
Today, with the ability of digital cameras store this information, which is known as EXIF data. Post-processing software uses this information. Compared to the film and print process, technology in post-processing develops an image for print or display output.
These capabilities often lead photographers to consider omitting the process of using notebooks, especially with the availability of planning and visualization tools such as scouting with your smartphone, planning a shoot using PhotoPills, Google Earth’s Sun feature, Sony Creator’s App that connects directly to a Sony camera, and Adobe Capture.
Taking field notes as a digital photographer is crucial for several reasons. Firstly, it helps document the technical settings and environmental conditions, allowing photographers to replicate or refine their process in future shoots. Notes on lighting, weather, and camera settings provide valuable data for post-processing and learning. Secondly, field notes can capture creative ideas and inspirations that occur during the shoot, ensuring these fleeting thoughts are not lost. Lastly, detailed notes enhance the ability to evaluate and critique the work, leading to continuous improvement. They serve as a personal log of growth and development, helping photographers understand what techniques work best for their style and subject matter. By integrating field notes into their practice, digital photographers can achieve greater consistency, creativity, and mastery over their craft. This is what the following two YouTube videos helps to illustrate.

