Photographing at Kaw Point
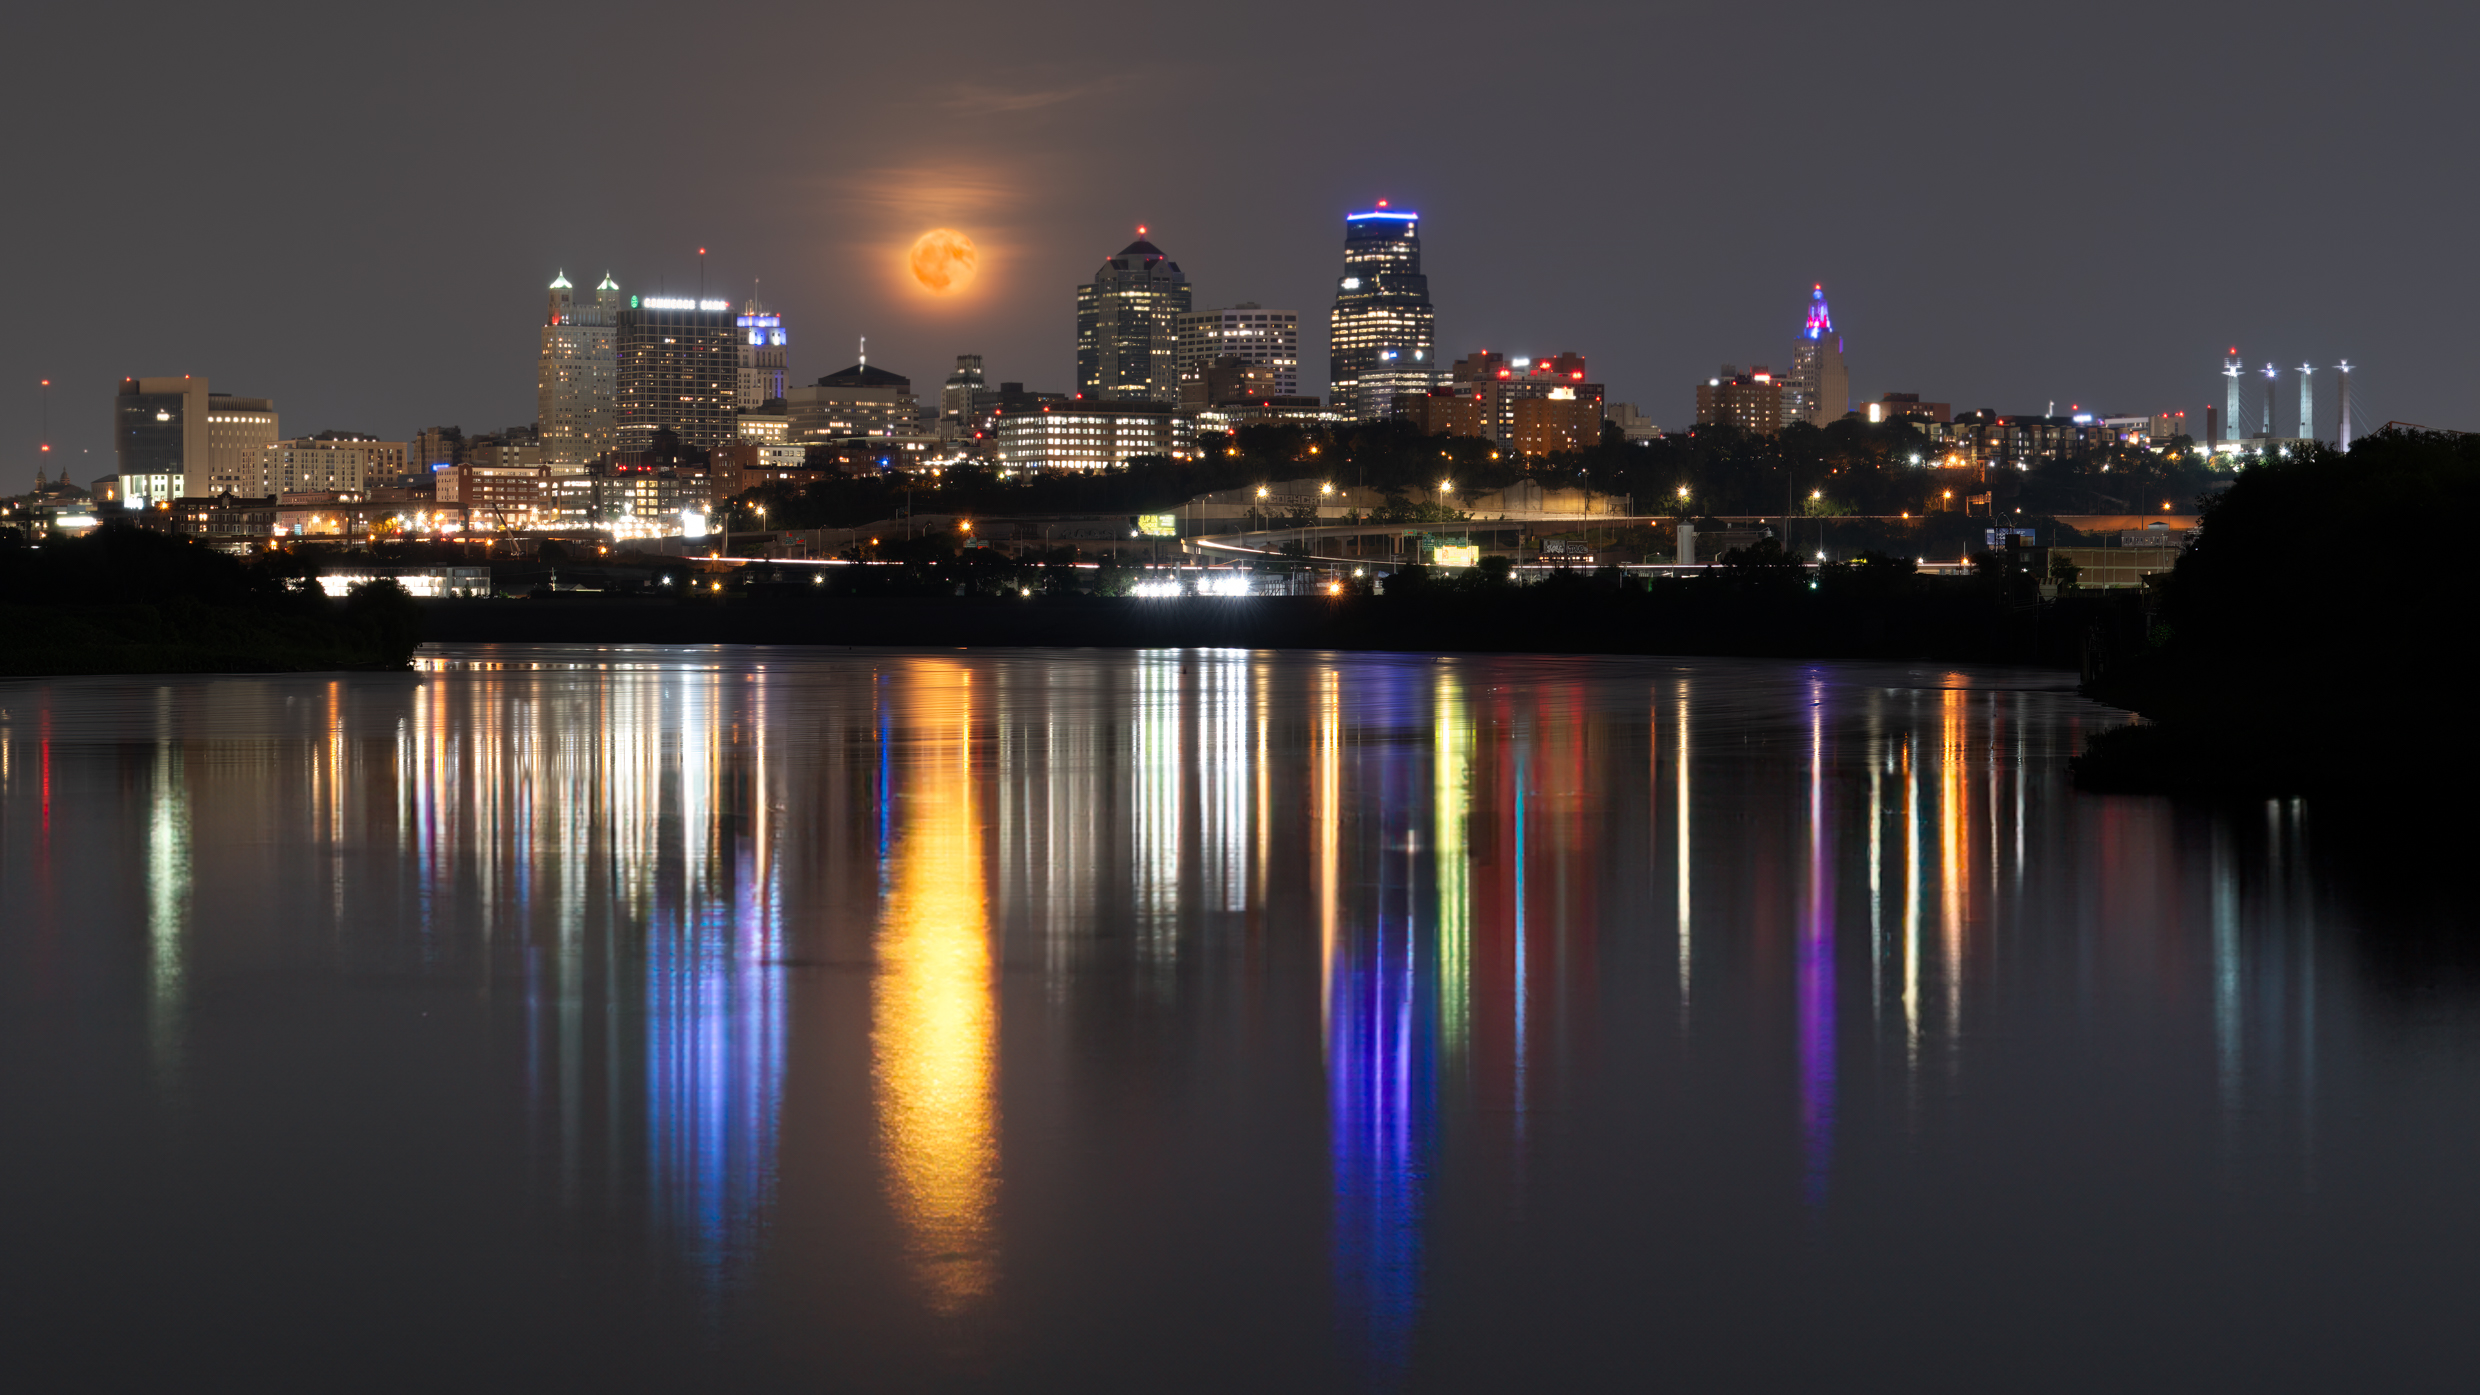
Kaw Point is a very popular place to observe the onset of a Kansas City nightscape lighting up and reflecting city lights upon the Missouri River. Photographers frequent this location because the cityscape rests on the bluff in the distance with a dividing line between the river bottoms structures and the city’s high rises that reflect upon the widest part of Missouri River. This is because Kaw Point is at the confluence of the Kansas River into the Missouri at the bend in the river, as shown in the street view screen capture from Google Earth at the parking lot of Kaw Point. The river at this point is 1,183 feet wide compared to its typical 840 feet width.
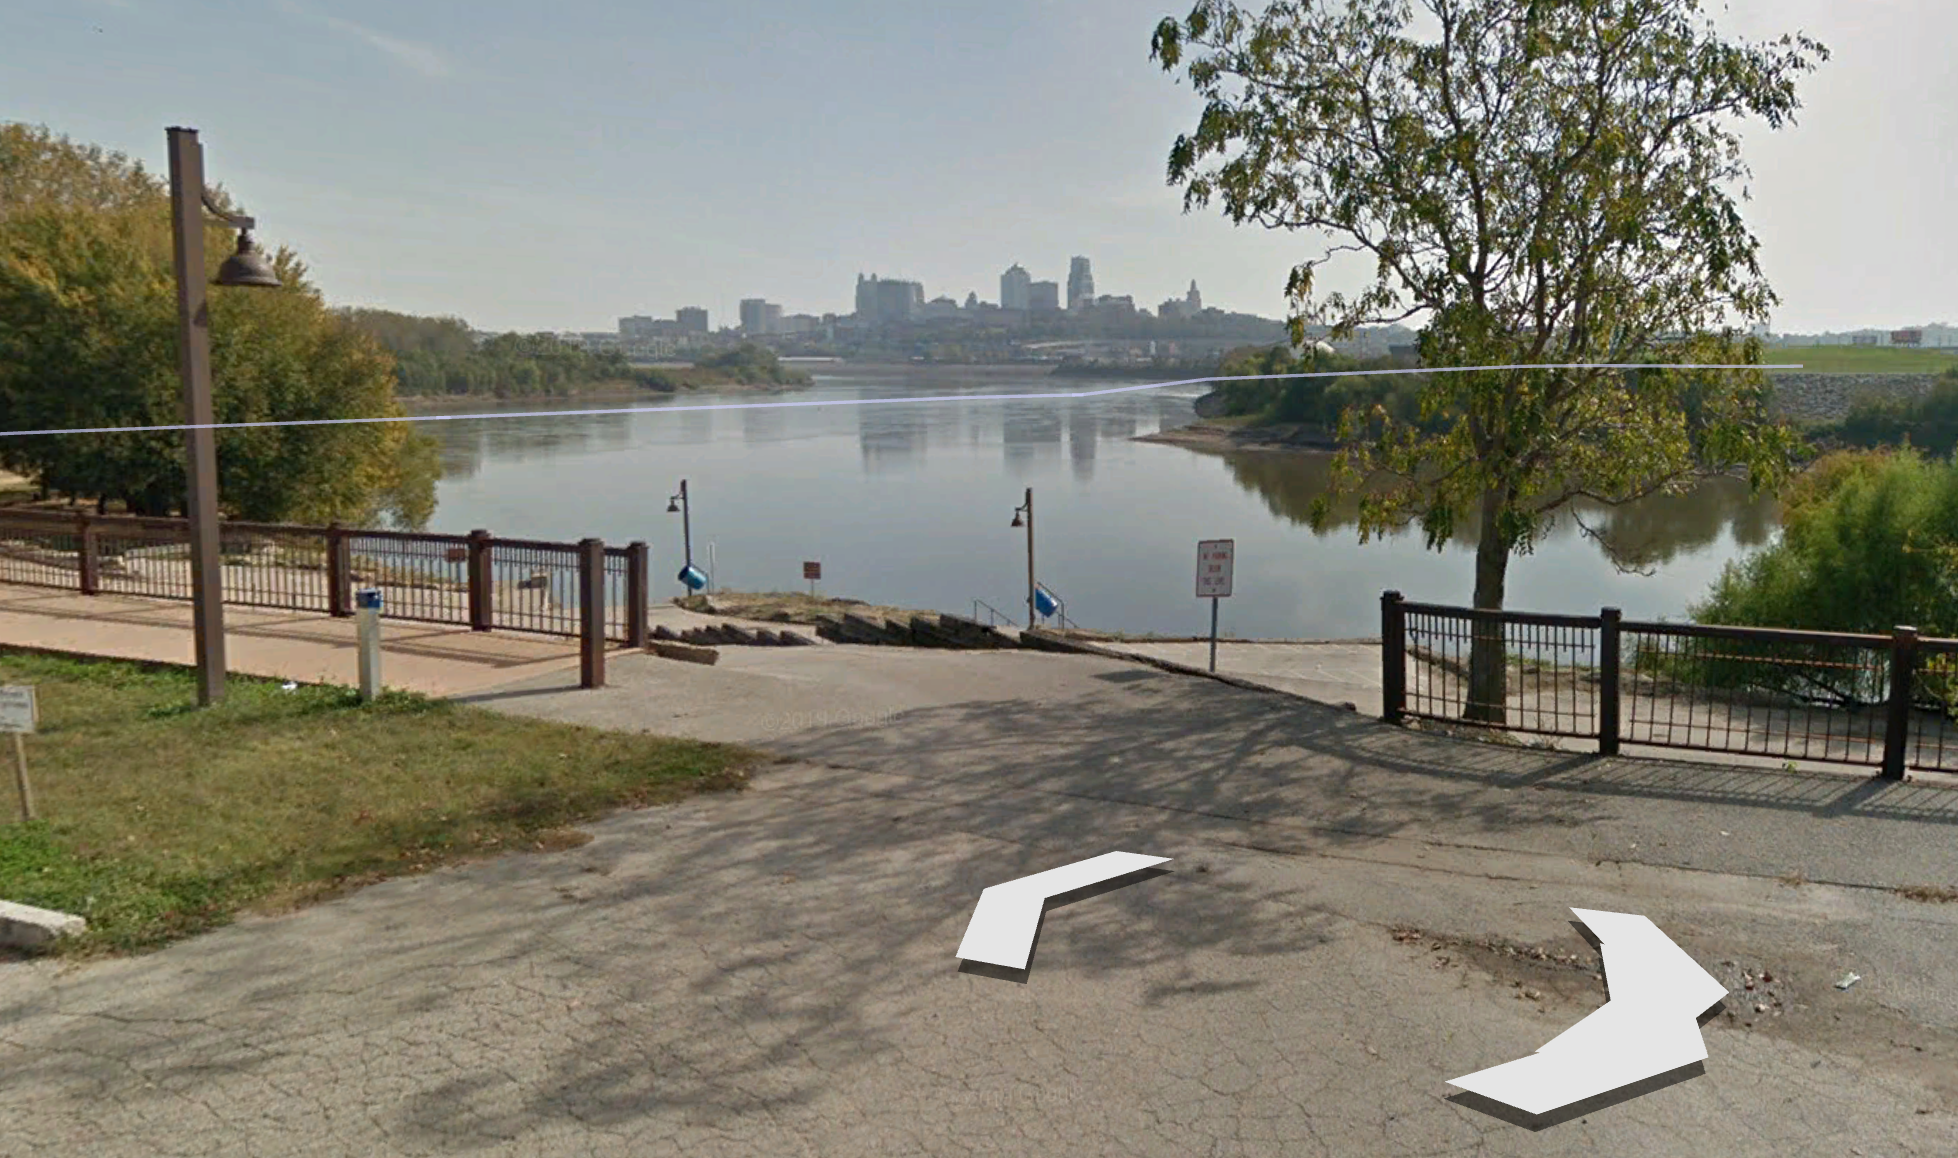
Accessibility is also the other reason this is a popular photography location, as the above street view from Google Earth reveals. To get to the river’s edge for the shot is just a short walk from the parking lot. Below are the common areas most photographers want to shoot at.
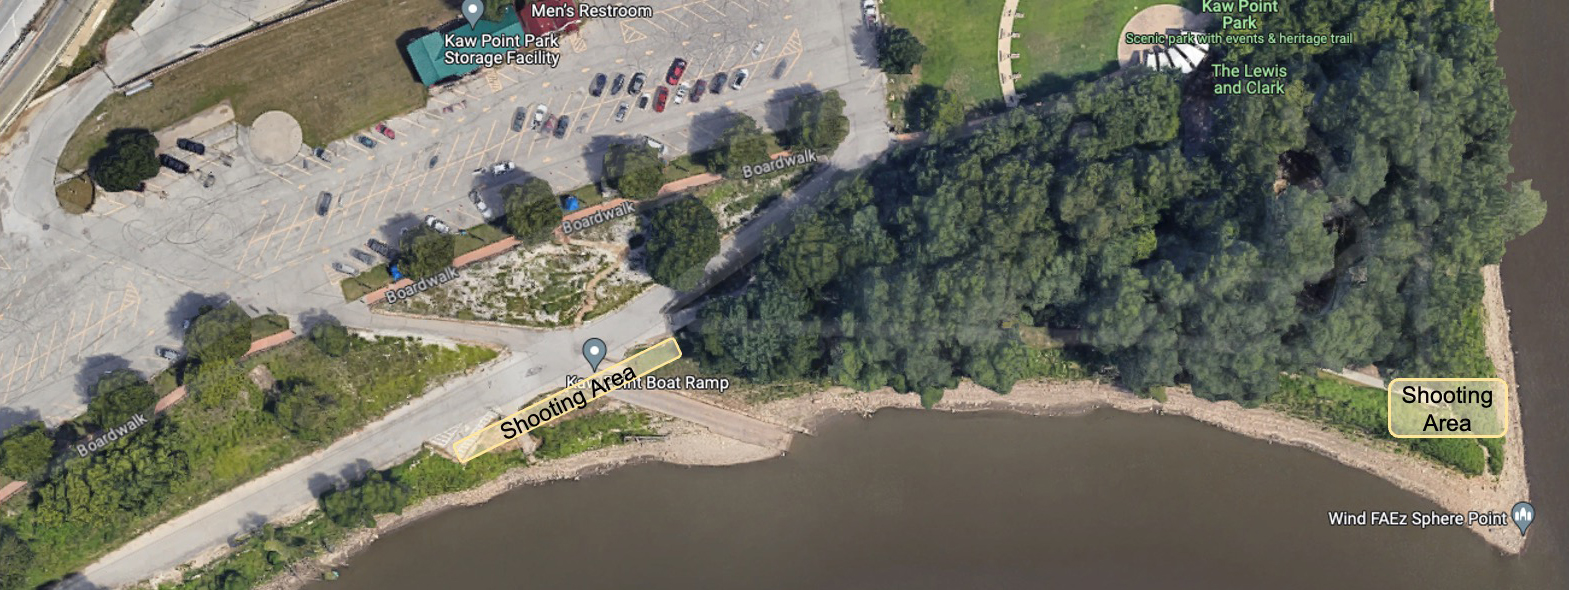
The point is very popular during the daytime, as it offers a metal cutout status of Lewis and Clark pointing North up the Missouri River to poise beside the get an Instagram shot. As you can see from the shot below. Based upon how you layout the photo you can position the statue pointing at the city. But this location cuts off a portion of the city that would affect your night shot.

Laying Out Your Shoot
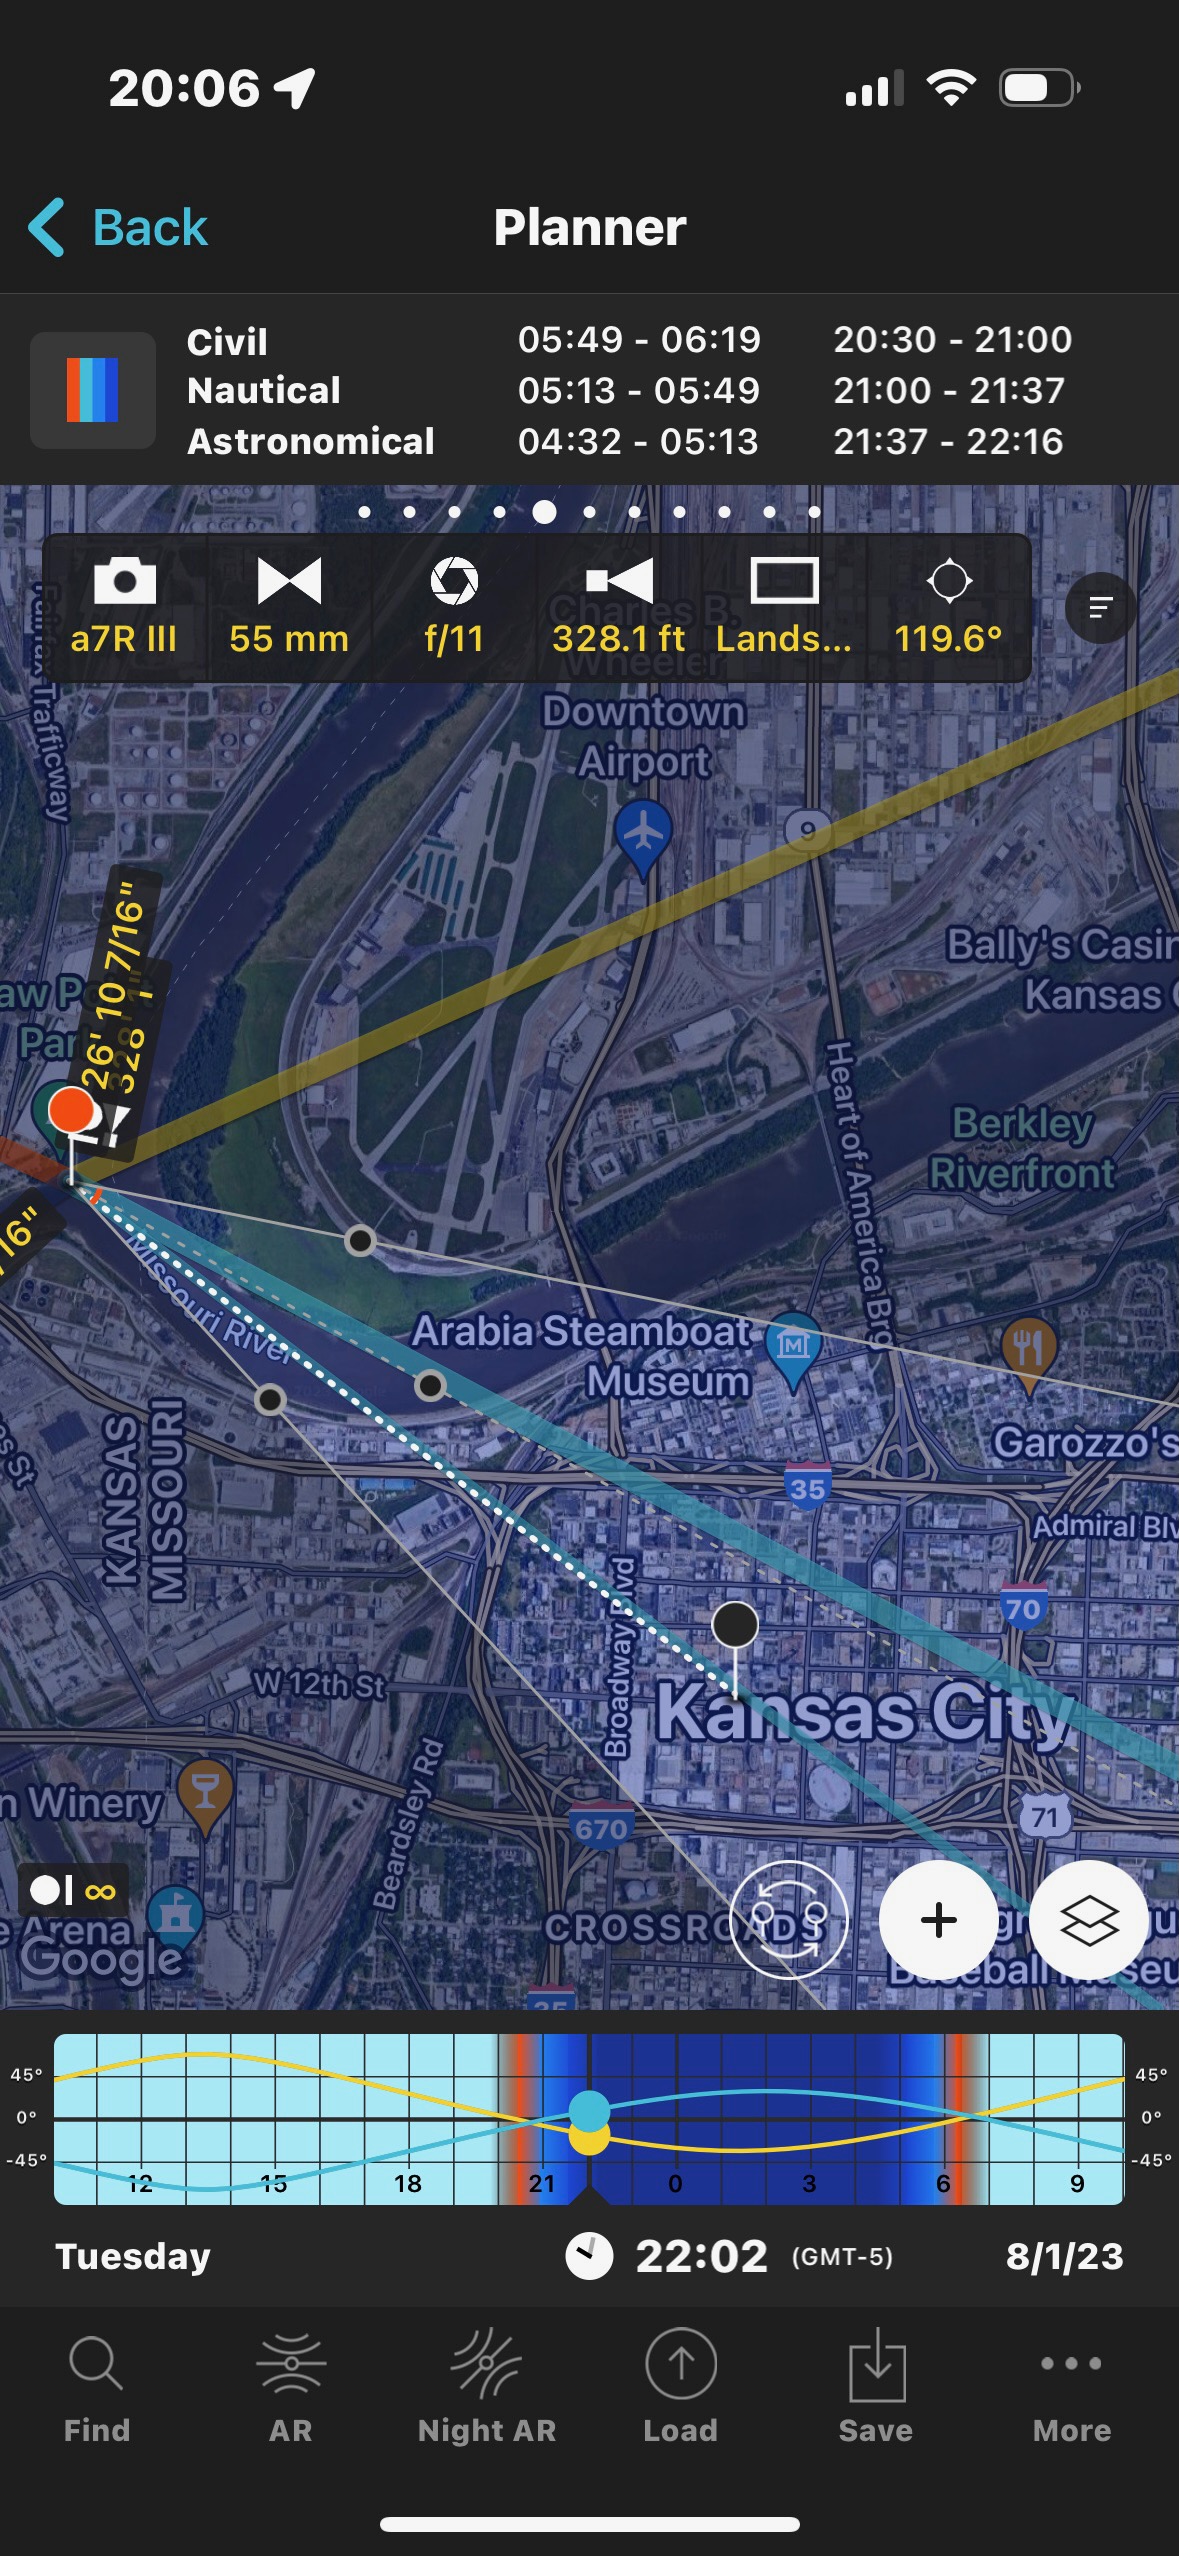
The common layout is a bank-to-bank shot using those banks to frame the city in the background. Shooting from the boat launch area calculates to a 50mm-55mm focal length, which renders a photo similar to the featured photo in this post. For those that you PhotoPills, here are the camera settings to get this desired composition. This has a focal length of 55mm with an aperture of f/11. PhotoPills users can get the .kmz file to upload into their app by clicking here. Use this link to learn about how to import this plan into your PhotoPills app.
PhotoPills also allows you to calculate when the moon will be at a certain location and reveal the date and time you need to be there, such as shown in this Augmented Reality screen capture in PhotoPills while reconning the Kaw Point site. To gain the optimum position of the moon in relation to the city, suggest checking out PhotoPills Moon Photography with Buildings | Step by Step Planning Tutorial.
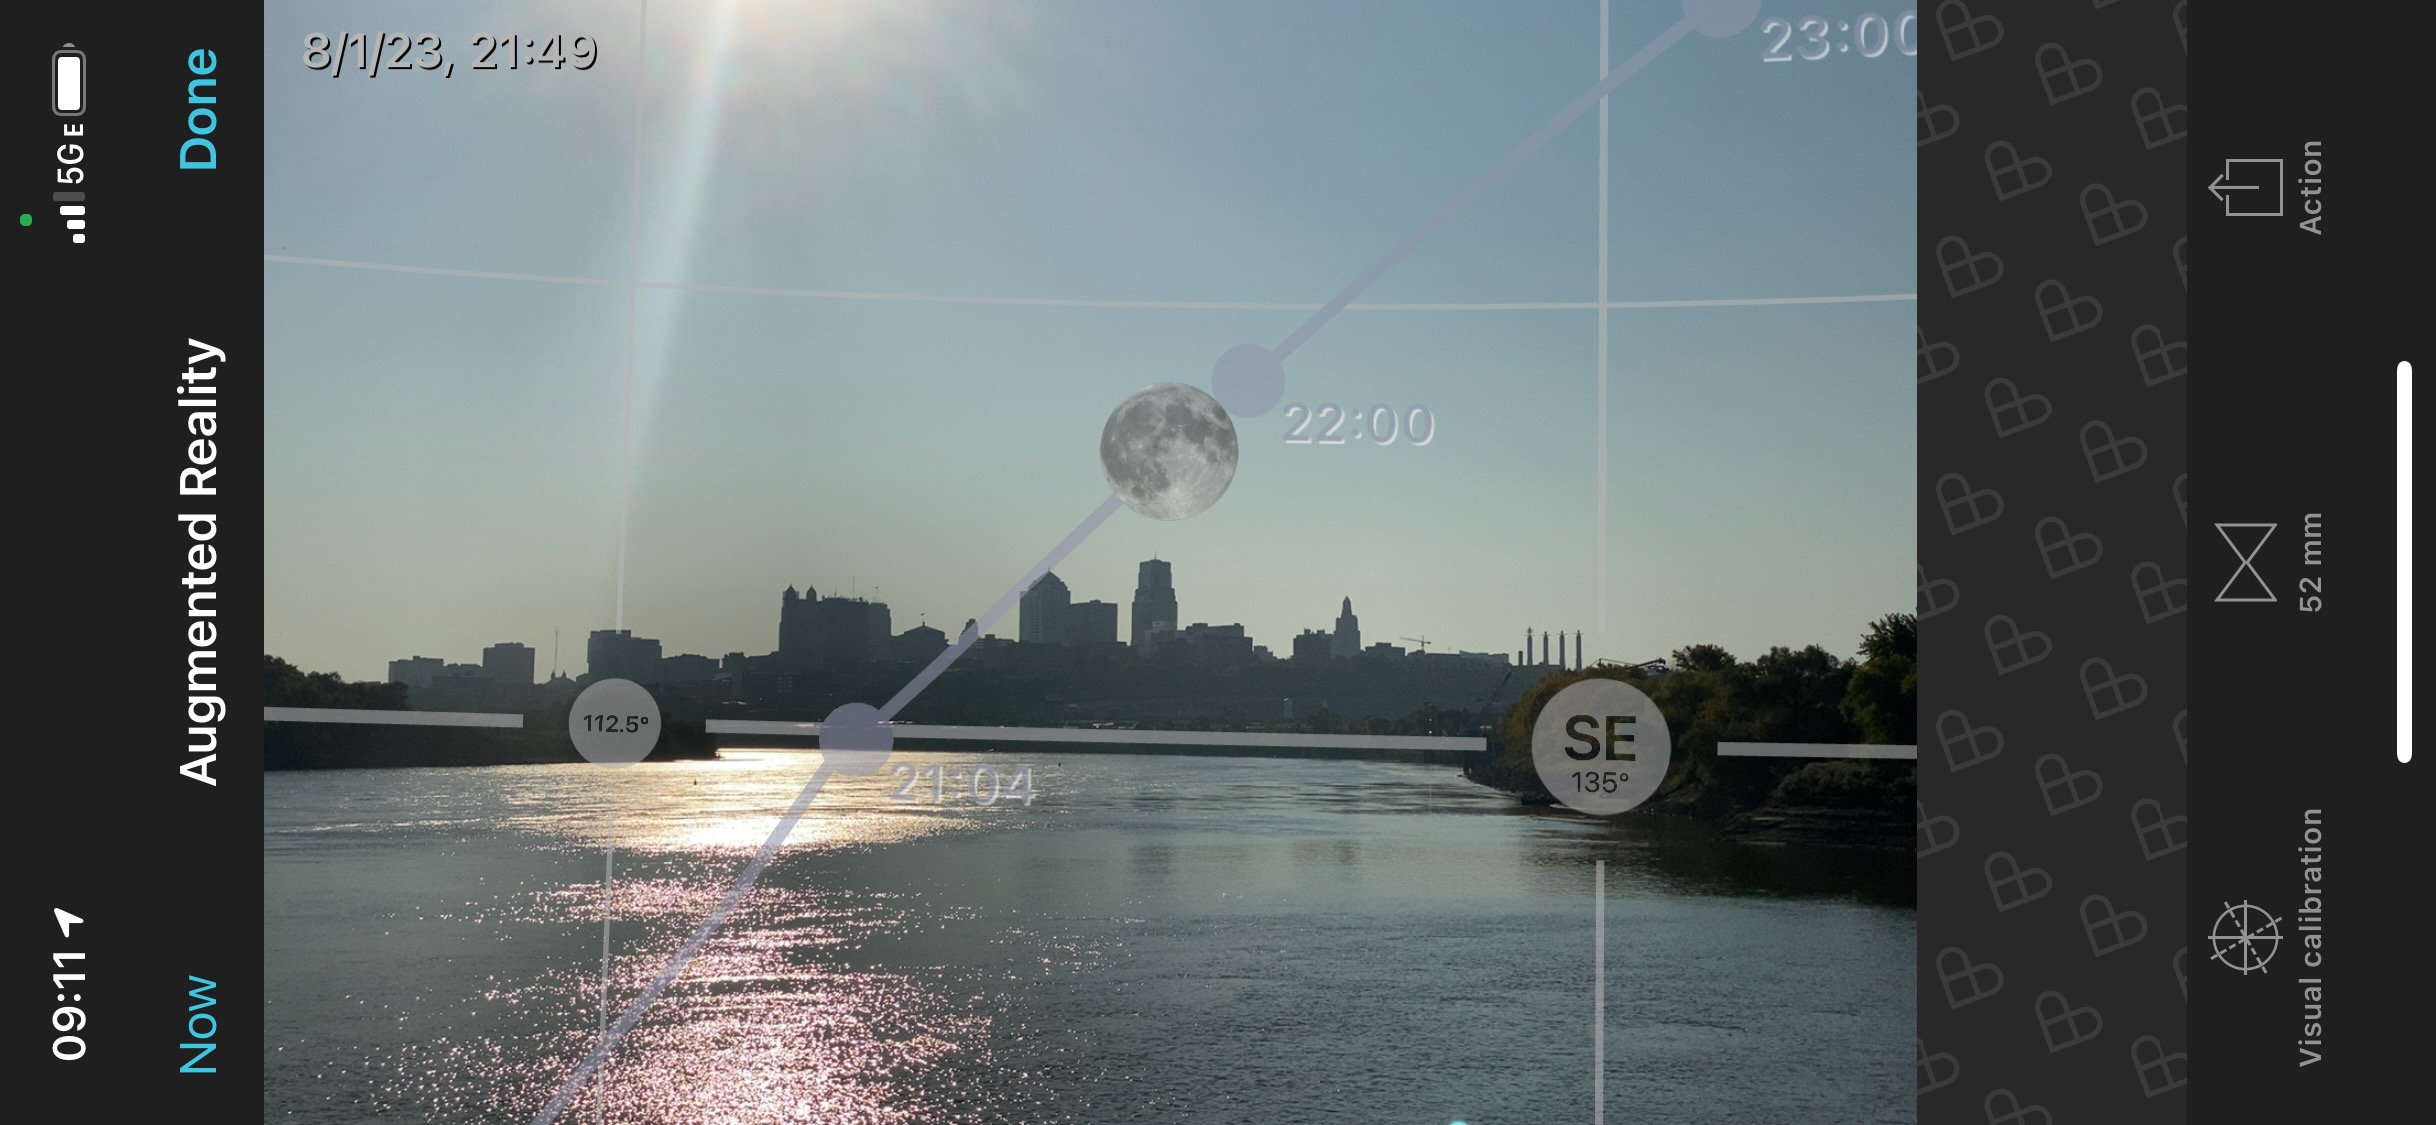
Photo Strategy
As a photographer, you will need to take your photo with a strategy designed around your camera capabilities and your skills. For those that want to reach beyond their skills to get the optimum image what follows are settings based upon a photo strategy for a composite image blended to achieve the maximum effort to:
- Capture the moon with sharpness
- Capture the cityscape with sharpness
- Capture proper exposure to the city lights
- Smooth the river water and gain the desired reflection effect
What follows is a brief summary of how to apply each of these four strategies.
Capturing the moon with sharpness
General Camera Settings
- Always shoot raw so you can get as many details from the moon and make adjustments to white-balance when post-processing.
- It is good to use manual focusing using the focus ring instead of autofocus. Zoom in on live-view and focus to get the images in sharp focus.
- Turn off image stabilization when the camera is on a tripod.
- If using a DSLR camera, make use of the mirror lock-up feature to avoid camera shake due to mirror slap.
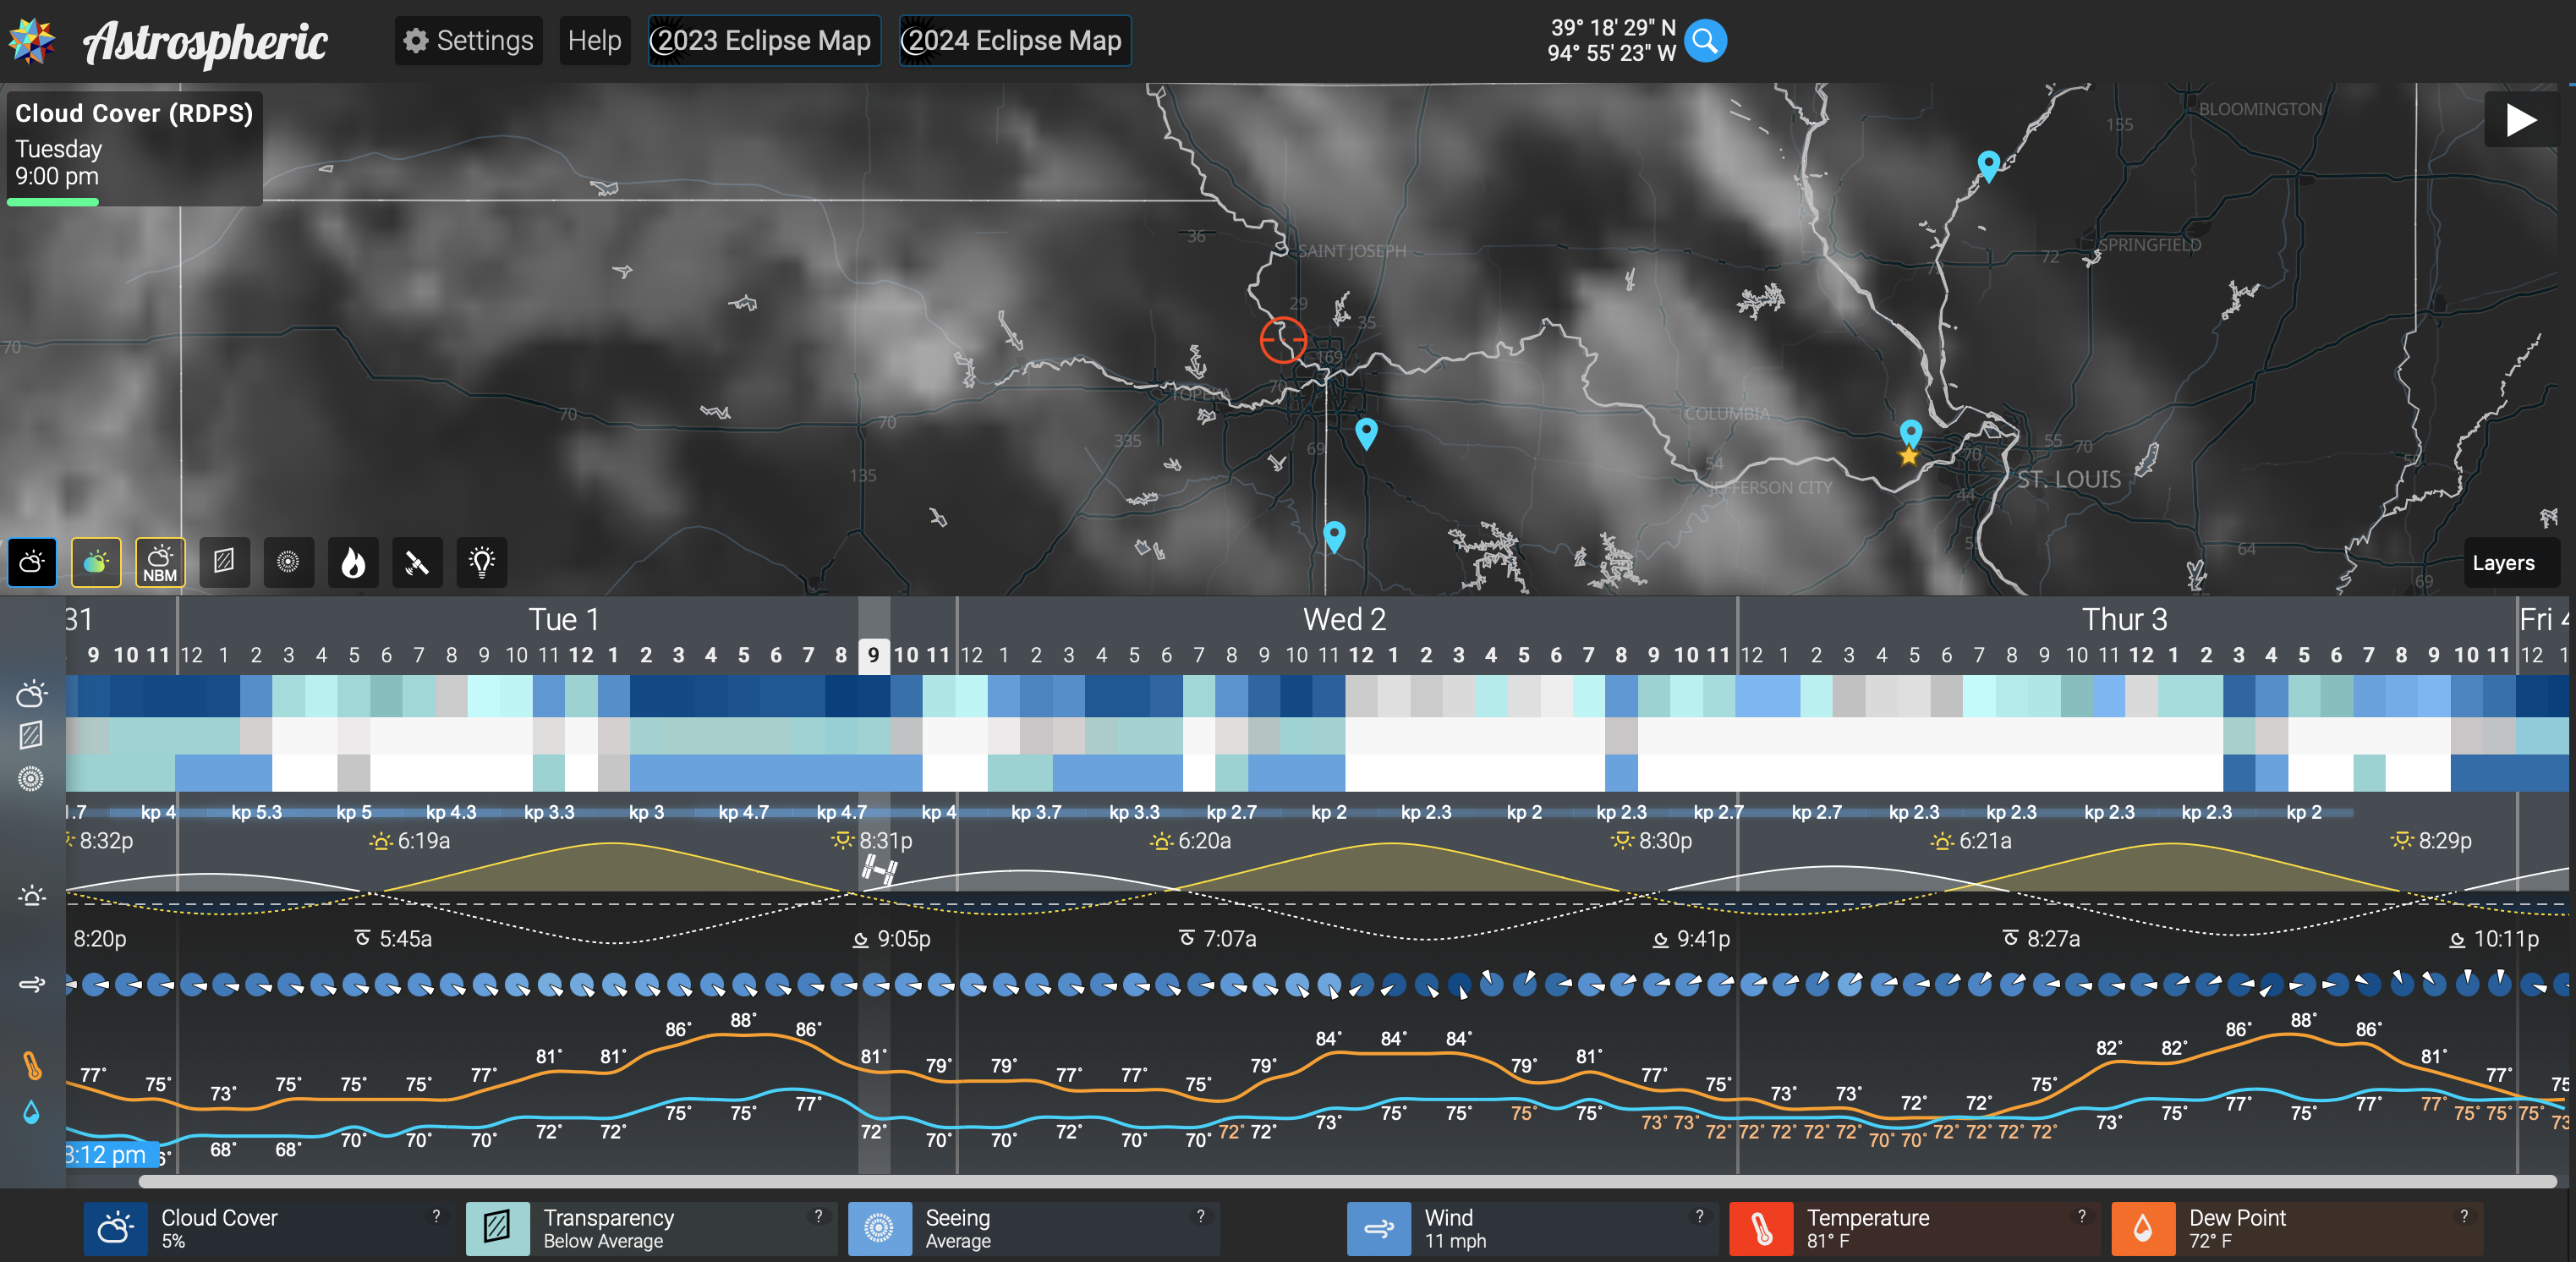
- Know if there is clear sky or minimum cloud obstruction using apps like Clear Outside or Astropheric. Here is the August 1 Supermoon projected cloud cover showing cloud dissipation during prime positioning of the moon over the city.
ISO
Digital camera settings should be set to 100 ISO or lower. Film shooters should shoot film of 100 ISO or slower to eliminate noise and grain. Some cameras will have the lowest setting of ISO 200. If you are using a very long telephoto lens, you will need to make the shutter speed faster comparatively to avoid capturing the movement of the moon across the sky. In that case, or if the sky conditions are not too good, you may have to slightly increase the iso.
Aperture
Because you’re after crisp, clean shots, shooting at f/11 to f/16, depending on your lens, will be the best place to start. Research your lens’ sweet spot to find the sharpest aperture. Using narrow aperture values will require increasing the iso during the waning and waxing moon phases, especially when the moon is less than a quarter. When conditions are bad, you can open up the aperture to about f/8 or f/5.6 but make sure that the images are acceptably sharp.
Shutter speed
The variables are many and include those mentioned earlier, such as the phase the moon is in, geographical location and desired shot, but on a clear night starting at about 1/60th to 1/125th shutter speed on your camera settings should be a great starting point. Depending on the brightness and focal length as well, you will need to make adjustments to shutter speeds.
A slow shutter speed can cause images to become blurred, especially as the focal length increases, when you are hand holding the camera, etc., and also the moon moves across the sky. Some cameras even have a camera app that can be used to adjust exposure for the setting you are looking to use. Make sure you use a fast shutter speed to get the details sharp on the moon.
What Is The Looney 11 Rule?
There is a “rule of thumb” that is easy to memorize and should get you close to good exposure of the face of the moon – the “looney 11 rule.” This rule is a method of estimating correct exposures without a light meter. For daylight photography, there is a similar rule called the sunny 16 rule.
The looney 11 rule is a very simple guideline intended to give the photographer a baseline to start from when shooting the moon at night.
The Rule: For astronomical photos of the Moon’s surface, set the aperture to f/11 and shutter speed to the reciprocal of the ISO setting.
For example: f/11 at ISO 100 and 1/100th second shutter speed.
Another example: f/11 at ISO 200 and 1/200 second shutter speed.
The looney 11 rule is worth keeping in mind for getting good exposure when you photograph the moon.
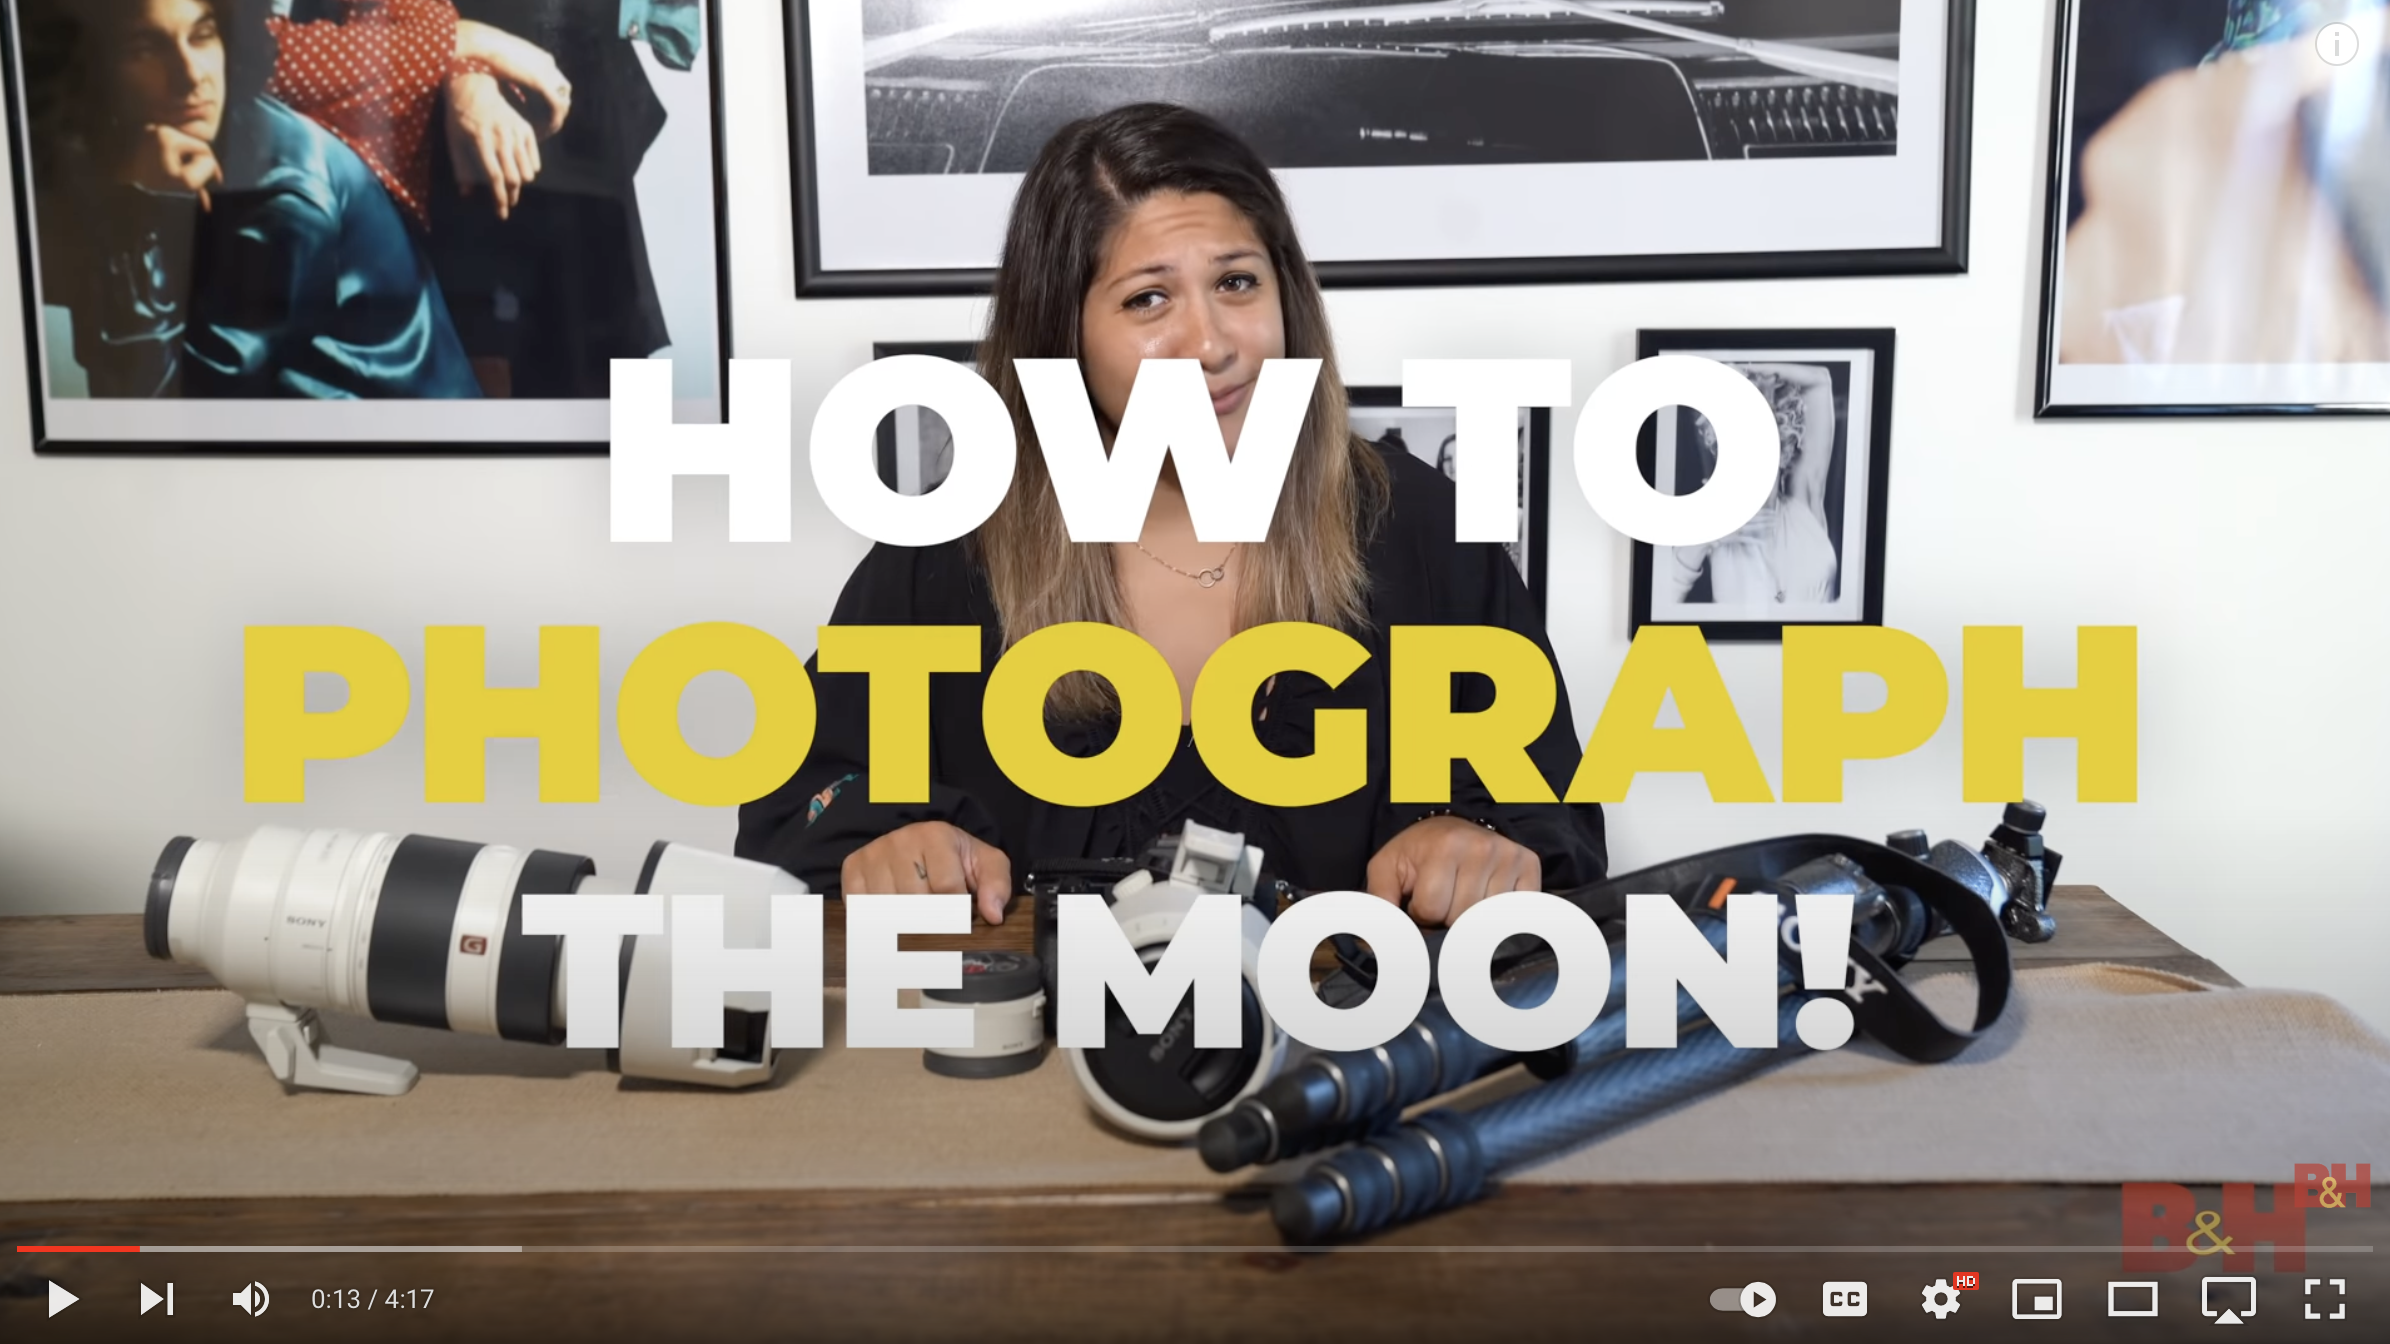
Want to learn more, then check out this YouTube video titled How to Photograph the Moon. Click on the title of the image to play.
Click here for your PhotoPills guide to shooting the moon.
Capture the cityscape with sharpness
Shoot in RAW
The best way to get the most information in your files and therefore the best quality photographs is to shoot RAW. Exposure and white balance both can be tricky with night photography and the more information you collect while shooting, the more leeway you will have when you get into post-processing for adjustments.
Low ISO
While astrophotography generally calls for a high ISO since it requires very dark skies for visible stars, the lights of towns and cities create an overall brighter scene. This allows for a low ISO to help reduce noise in your images. Depending on the available light as well as my aperture and shutter speed choices, my ISO is typically between 200 and 800.
Manual Focus
Focusing manually is the best way to ensure sharp focus in night photography. If you are close enough to lights and points of contrast, I find autofocus can work quite well, but as it gets darker, when you are further away from the scene, or when you are using a wide-angle lens, autofocus will often miss the mark. Even if you think autofocus is working for you, I recommend using live view and zooming in on a point of contrast, and manually tweaking the focus until sharp.
White Balance
The choice of white balance at night can be a bit tricky. The night shadows tend to be very cool but the city lights are very warm. Be aware of this dichotomy and try to balance out the intensity of the warm lights with the cool shadows. Like all imagery, the choice of white balance is subjective for the look and mood you want to portray so you may have a preference for warmer or cooler tones. Using live view can often help me find my happy place with the color. If your camera’s auto white balance does a good job, that can often be a great choice as well.
Bracket exposures
Night city scenes present a challenge as they have a high dynamic range to capture. The lights of buildings and vehicles are quite bright while the shadows are dark, making the dynamic range more than cameras can capture in a single exposure. Bracketing exposures by programming your camera or by adjusting your settings manually is the best way to ensure you capture detail in both the shadows or highlights.
Histogram
Use your histogram to help you evaluate your exposure. Your LCD screen is not a great way to check exposure which is why I recommended in preparation to turn the brightness down. This way it won’t trick you into thinking you have proper exposure when you don’t. With the high dynamic range, check your highlights and your shadows to ensure you have detail in both. Refer back to those bracketed exposures. If your brightest bracketed exposure still has clipped shadows, brighten it up. If your darkest bracketed exposure still has blown highlights, reduce the exposure. While sometimes you may find you can recover enough information to make a single exposure work, it is always best to gather as much information in the field as you can.
Take Test Shots
Don’t be afraid to take test shots and examine them for focus, exposure, and white balance. Examine them to consider your composition as well to see if you have included distracting elements or cut off important lines or features. Zoom in to check for sharp focus. Check your histogram for the dynamic range. Check to see if your images are excessively warm or cool.
Create Starbursts of City Lights
Close your aperture down to capture the starbursts of those city lights. F/16 is a great number to aim for. If you need more light.
Capture proper exposure of the city lights
Always pay attention to the main light sources in a scene. This is true no matter where or when you are photographing, but it becomes even more important at night. So instead of hunting for subjects, start by finding a beautiful light source or an area with good lighting, then wait around for something to happen.
Note that night street photography lighting can be anything: car headlights, streetlights, neon signs, window lighting, or even smartphone light. Simply look for noticeable illumination, then pay careful attention to how these light sources hit potential subjects. Adjust your angle until you get the lighting effect you want, then shoot away!
Try shooting in manual mode adjusting the shutter speed to till the light isn’t overexposed. Take a picture at this setting. Open your exposure decreasing your shutter speed by 2 clicks and take another exposure. Repeat till you get the building at the desired visibility. Later you will merge them into a high-density image or blend them in Photoshop, which is the preferred method.
Smooth the river water and gain the desired reflection effect
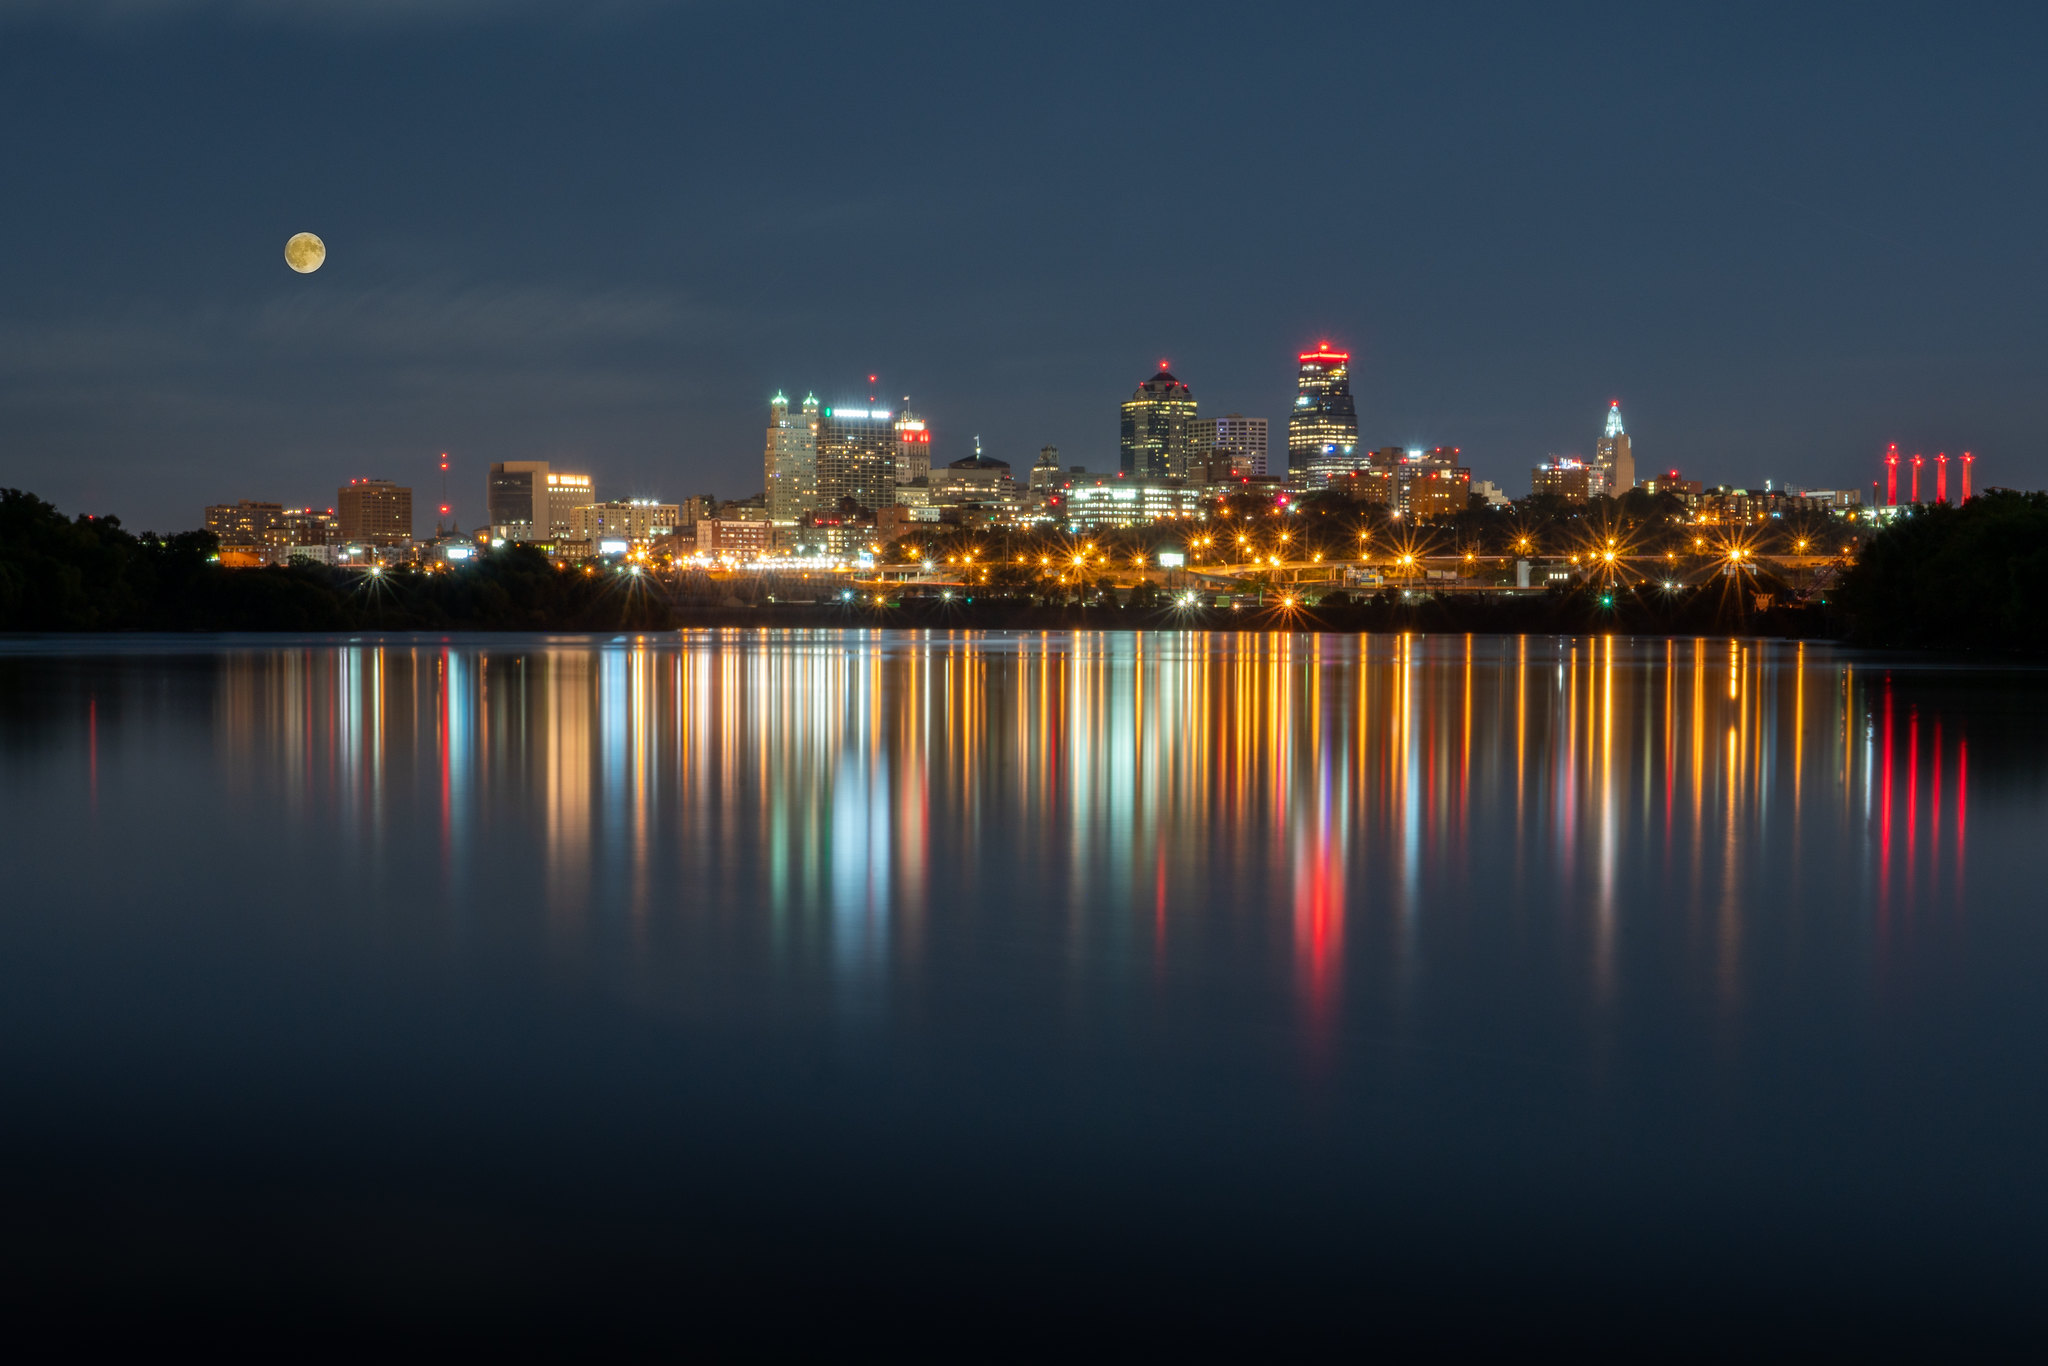
Here is the base guide on smoothing the Missouri River water and determining your desired long exposure. The shutter speed needs to be slower than the ‘period’ of the waves (or 1 over the frequency) – this will cause the water to look flat. With most waves and because you are shooting at night you’re looking at a starting shutter speed of about 30 seconds (or more) for smooth water. It is best to shoot in manual mode opening the shutter speed and taking images till you find one that has the desired smoothness. For the below image, I applied neutral density filters and increased the exposure time that smoothes out a flood to the smoothness shown in this image.
Putting it all together
The best solution to blending these images is first to work with each of these four factors separately till you have the desired outcome, then blend these together to make the final photo. In conclusion, here is a guide on Kaw Point, and as always, enjoy your shooting opportunity.

